PIC18F45K20-E/ML Microchip Technology, PIC18F45K20-E/ML Datasheet - Page 76
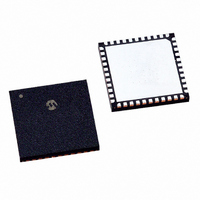
PIC18F45K20-E/ML
Manufacturer Part Number
PIC18F45K20-E/ML
Description
32KB, Flash, 1536bytes-RAM, 36I/O, 8-bit Family,nanowatt XLP 44 QFN 8x8x0.9mm TU
Manufacturer
Microchip Technology
Series
PIC® XLP™ 18Fr
Datasheets
1.PIC18F25K20T-ISS.pdf
(42 pages)
2.PIC18F25K20T-ISS.pdf
(12 pages)
3.PIC18F25K20T-ISS.pdf
(14 pages)
4.PIC18F25K20T-ISS.pdf
(456 pages)
5.PIC18F45K20-IPT.pdf
(78 pages)
Specifications of PIC18F45K20-E/ML
Core Processor
PIC
Core Size
8-Bit
Speed
48MHz
Connectivity
I²C, SPI, UART/USART
Peripherals
Brown-out Detect/Reset, HLVD, POR, PWM, WDT
Number Of I /o
35
Program Memory Size
32KB (16K x 16)
Program Memory Type
FLASH
Eeprom Size
256 x 8
Ram Size
1.5K x 8
Voltage - Supply (vcc/vdd)
1.8 V ~ 3.6 V
Data Converters
A/D 14x10b
Oscillator Type
Internal
Operating Temperature
-40°C ~ 125°C
Package / Case
44-QFN
Lead Free Status / RoHS Status
Lead free / RoHS Compliant
For Use With
DM240313 - BOARD DEMO 8BIT XLPAC164112 - VOLTAGE LIMITER MPLAB ICD2 VPPDM164124 - KIT STARTER FOR PIC18F4XK20AC164322 - MODULE SOCKET MPLAB PM3 28/44QFN
Lead Free Status / RoHS Status
Lead free / RoHS Compliant


PICkit™ 3 Debug Express
DS41370C-page 72
Finally, the CCP1 module is configured for PWM operation with a duty cycle of 50% as
described previously in this lesson:
At this point in the program in the module running, generating and outputting a PWM
signal on RD7/P1D with 50% duty cycle at 62.5 Hz.
To make the LED get brighter and then dimmer, we have a loop that changes the duty
cycle. The first do while loop increases the brightness over 2 seconds by increasing
the duty cycle. As the duty cycle is increased, the LED is on for a longer period of time
so it appears brighter. Note that for simplicity, the lesson program only changes the 8
MSbs of the duty cycle value in CCPR1L.
The second do while loop decreases the brightness over 2 seconds by reducing the
duty cycle. As the duty cycle is decreased, the LED is on for shorter and shorter periods
of time, making it appear dimmer.
3.12.4
Build and program the Lesson 12 project, then Run the application in the debugger. You
will see the demo board LED 7 continuously get brighter then dimmer! If you have an
oscilloscope available, connect a probe to one of the RD7 signal points on the demo
board to see the changing the PWM waveform.
CCPR1L = 0x7D; // The 8 most significant bits of the period are 0x7D
CCP1CON = 0b01001100; // The 2 LSbs are 0b00, and CCP1Mx = 110 for PWM
Build and Run the Lesson 12 Code with PICkit 3 Debug Express
© 2009 Microchip Technology Inc.
Related parts for PIC18F45K20-E/ML
Image
Part Number
Description
Manufacturer
Datasheet
Request
R

Part Number:
Description:
Manufacturer:
Microchip Technology Inc.
Datasheet:
Part Number:
Description:
Manufacturer:
Microchip Technology Inc.
Datasheet:
Part Number:
Description:
Manufacturer:
Microchip Technology Inc.
Datasheet:
Part Number:
Description:
Manufacturer:
Microchip Technology Inc.
Datasheet:
Part Number:
Description:
Manufacturer:
Microchip Technology Inc.
Datasheet:
Part Number:
Description:
Manufacturer:
Microchip Technology Inc.
Datasheet:
Part Number:
Description:
Manufacturer:
Microchip Technology Inc.
Datasheet:
Part Number:
Description:
Manufacturer:
Microchip Technology Inc.
Datasheet: