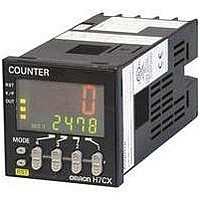
H7CX-AWSD DC12-24 Omron, H7CX-AWSD DC12-24 Datasheet - Page 57
H7CX-AWSD DC12-24
Manufacturer Part Number
H7CX-AWSD DC12-24
Description
COUNTER SCREW-TERM 6DIGT 1/16DIN
Manufacturer
Omron
Series
H7CXr
Datasheet
1.H7CX-AS_AC100-240.pdf
(63 pages)
Specifications of H7CX-AWSD DC12-24
Count Rate
*
Number Of Digits/alpha
6
Input Type
*
Output Type
*
Voltage - Supply
12 V ~ 24 V
Display Type
*
No. Of Digits / Alpha
6
Signal Input Type
PNP/NPN
Supply Voltage Max
24V
Panel Cutout Height
48mm
Supply Voltage Min
12V
Panel Cutout Width
48mm
Connector Type
Screw Terminal
Counter Supply Voltage
12-24VDC
Lead Free Status / RoHS Status
Lead free / RoHS Compliant
Lead Free Status / RoHS Status
Lead free / RoHS Compliant
Other names
H7CX-AWSDDC12-24
H7CXAWSDDC1224
H7CXAWSDDC1224


■ Self-diagnostic Function
The following displays will appear if an error occurs.
Note: 1. Includes the case where the EEPROM has reached its overwrite lifetime.
■ Operation in DIP Switch Monitor Mode
The H7CX-R is also equipped with a DIP switch monitor function, a convenient function that enables the settings of the DIP switch pins to be con-
firmed using the front display.
Note: When the mode is changed to DIP switch monitor, the measurement value is reset, outputs turns OFF, and measuring stops.
ffffff
(See note 3.)
e1
e2
e2
Main display
2. Occurs when the measurement value reaches 999,999.
3. Display flashes (1-second cycles).
Measurement stopped
Measurement possible
No change
Not lit
Not lit
sum
Sub-display
Power ON
1 s min.
+
1
Measurement value overflow
(See note 2.)
CPU
Memory error (RAM)
Memory error (EEP)
(See note 1.)
(See note.)
DIP switch
monitor
Error
OFF
ON
The status of the DIP switch pins (1 to 8) can be confirmed using the
To change the mode to DIP switch monitor mode, press the
Key for 1 s min. with the
change if the
keys.
Example
No change
OFF
OFF
OFF
Output status
1
HLD
TACHOMETER
2
HLD
3
1
key is pressed first.
4
Measurement value ≤ 999999
Either press the hold key or reset the
power supply.
Reset the power supply.
Reset to the factory settings using the
hold key.
5
6
1
key held down. The mode will not
7
Correction method
8
1
Indicates that DIP switch pin 8 is ON.
Indicates that DIP switch pin 7 is OFF.
Indicates that DIP switch pin 6 is ON.
Indicates that DIP switch pin 5 is OFF.
Indicates that DIP switch pin 4 is ON.
Indicates that DIP switch pin 3 is OFF.
Indicates that DIP switch pin 2 is ON.
Indicates that DIP switch pin 1 is OFF.
No change
No change
No change
0
Set value after
H7CX-R
reset
57