ADIS16100/PCB Analog Devices Inc, ADIS16100/PCB Datasheet - Page 12
ADIS16100/PCB
Manufacturer Part Number
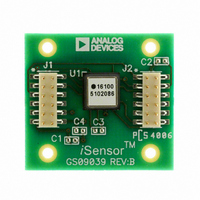
ADIS16100/PCB
Description
BOARD EVALUATION ADIS16100
Manufacturer
Analog Devices Inc
Series
iSensor™r
Specifications of ADIS16100/PCB
Sensor Type
Gyroscope, 1 Axis
Sensing Range
±300°/sec
Interface
SPI Serial
Voltage - Supply
4.75 V ~ 5.25 V
Embedded
No
Utilized Ic / Part
ADIS16100
Silicon Manufacturer
Analog Devices
Application Sub Type
Angular Rate Sensor / Gyroscope
Kit Application Type
Sensing - Motion / Vibration / Shock
Silicon Core Number
ADIS16100
Kit Contents
Board
Lead Free Status / RoHS Status
Contains lead / RoHS non-compliant
For Use With
ADISUSBZ - KIT EVAL ADIS W/SOFTWARE USBADISEVALZ - KIT PC EVALUATION W/SOFTWARE
Sensitivity
-
Lead Free Status / Rohs Status
Not Compliant


ADIS16100
BASIC OPERATION
The ADIS16100 is designed for simple integration into indus-
trial system designs, requiring only a 5.0 V power supply and a
4-wire, industry standard serial peripheral interface (SPI). The SPI
handles all digital input/output communications in the ADIS16100.
SERIAL PERIPHERAL INTERFACE (SPI)
The ADIS16100 SPI port includes four signals: chip select ( CS ),
serial clock (SCLK), data input (DIN), and data output (DOUT).
The CS line enables the ADIS16100 SPI port and frames each
SPI event. When this signal is high, the DOUT lines are in a
high impedance state and the signals on DIN and SCLK have
no impact on operation. A complete data frame contains 16 clock
cycles. Because the SPI port operates in full duplex mode, it
supports simultaneous, 16-bit receive (DIN) and transmit (DOUT)
functions within the same data frame.
Control Register
The DIN control register provides controls for two operational
settings: the output data source and the coding (twos comple-
ment vs. offset binary). Table 5 and Figure 22 provide the proper
bit definitions for the control register configuration. The DIN
sequence starts with a 1 for configuration sequences and a 0 for
read sequences. When this bit is 0, the remaining DIN bits do
not change the control register and the next sample’s output
data reflects the existing configuration. Data loads from the
DIN pin into the ADIS16100 on the falling edge of SCLK.
When the 16 SCLK sequence is complete, the control register
is updated and ready for the next read sequence. If a data
frame has less than 16 SCLK cycles, the control register does
not update and maintains its previous configuration. The DIN
bit definitions in Table 5, which have either 0 or 1 assigned to
them, are critical for proper operation.
DOUT
SCLK
DOUT
SCLK
DIN
CS
DIN
CS
WRITE
0
1
CONFIGURATION COMMAND FOR NEXT OUTPUT SEQUENCE
0
ADC PLACED IN HOLD MODE
0
DATA OUTPUT, BASED ON PREVIOUS CONFIGURATION
2
ADD1
D/C
DATA FRAME
3
ADD0
D/C
4
Figure 22. SPI Sequence, Clock Polarity = 0, Clock Phase = 0
D11
ADD1
Figure 21. Configuration and Read Sequence
5
D10
ADD0
6
D9
Rev. D | Page 12 of 16
1
7
D8
1
8
D7
D/C
ADC Conversion
The chip select ( CS ) and serial clock (SCLK) lines control the
on-board analog-to-digital conversion process. When the chip
select line goes low, the DOUT line comes out of three-state
mode, the track-and-hold goes into hold mode, and the ADC
samples the analog input at this point. The track-and-hold
returns to track mode on the 14
The serial clock drives the internal ADC conversion clock,
using its falling edge for control of this process. All 16 SCLK
cycles are required for a complete conversion. If a data frame
has less than 16 SCLK cycles, the conversion cannot complete
and does not update the output data for the next data frame cycle.
Output Data Access
The DOUT sequence starts with two zeros, one that clocks out
after the falling edge of CS , and another that clocks out on the
first SCLK falling edge. The next 14 bits, ADD0, ADD1, and the
12 data bits, clock out on SCLK falling edges. After the 16
falling edge, the DOUT line moves to a three-state mode.
When setting up the system process to receive data from the
ADIS16100, use a clock phase setting of 0 and a clock polarity
setting of 0. These settings reflect the timing displayed in
Figure 22. To maintain proper communication at the maximum
specified clock rates, the system processor must be able to support
the setup time requirement listed in Figure 2 and Table 2 (t
ADC PLACED IN TRACK MODE
9
D6
D/C
10
D5
0
11
NEXT COMMAND, IF NECESSARY
D4
CODE
DATA FRAME
12
D3
D/C
13
D2
D/C
th
14
falling edge of the SCLK line.
D1
D/C
15
D0
D/C
16
th
9
).
Related parts for ADIS16100/PCB
Image
Part Number
Description
Manufacturer
Datasheet
Request
R

Part Number:
Description:
±1.7g Dual-Axis IMEMS Accelerometer Evaluation Board
Manufacturer:
Analog Devices Inc
Datasheet:

Part Number:
Description:
Inertial Sensor Evaluation System
Manufacturer:
Analog Devices Inc
Datasheet:
Part Number:
Description:
Manufacturer:
Analog Devices Inc
Datasheet:
Part Number:
Description:
Manufacturer:
Analog Devices Inc
Datasheet:
Part Number:
Description:
Manufacturer:
Analog Devices Inc
Datasheet:
Part Number:
Description:
Manufacturer:
Analog Devices Inc
Datasheet:
Part Number:
Description:
Manufacturer:
Analog Devices Inc
Datasheet:
Part Number:
Description:
Manufacturer:
Analog Devices Inc
Datasheet:
Part Number:
Description:
Manufacturer:
Analog Devices Inc
Datasheet:
Part Number:
Description:
Manufacturer:
Analog Devices Inc
Datasheet:
Part Number:
Description:
Manufacturer:
Analog Devices Inc
Datasheet:
Part Number:
Description:
Manufacturer:
Analog Devices Inc
Datasheet:
Part Number:
Description:
Manufacturer:
Analog Devices Inc
Datasheet: