318451-2 Tyco Electronics, 318451-2 Datasheet - Page 3
318451-2
Manufacturer Part Number
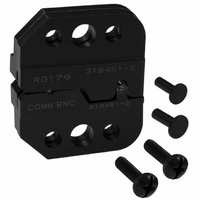
318451-2
Description
DIE SET
Manufacturer
Tyco Electronics
Series
Pro-Crimper™ IIIr
Type
Crimp Toolr
Specifications of 318451-2
Connector Type
Coax Connectors
Crimp Handle
Tyco/AMP 318451-1
Crimp Or Cable Size
RG/U-79, 161, 187
Features
"O" / Commercial
Crimp Application
Coaxial
Product
Crimping, Stripping & Cutting Tools & Drills
For Use With
75 Ohm BNC RF/Coaxial Connectors
Lead Free Status / RoHS Status
Not applicable / Not applicable
Lead Free Status / RoHS Status
na, Not applicable / Not applicable
Other names
318451-2
A24630
A24630


Rev A
Center Contact Crimp
Center Contact
Flange Against
Edge of Die
Ferrule Crimp
CAUTION
2. Slide the ferrule forward over the braid until the
ferrule is against the connector body.
3. Place the ferrule in the crimping chamber on the
anvil die so that the shoulder of the connector body
is against the edge of the die. Refer to Figure 4.
4. Holding the assembly in place, close the tool
handles until the ratchet releases.
5. Allow the handles to open fully, and remove the
crimped assembly from the die assembly.
Anvil Die
Ferrule
Anvil Die
Stripped Cable
Damaged contacts should not be used. If a
damaged contact is evident, it should be cut from
the wire and replaced with a new one. Contacts
should not be reterminated.
Figure 3
PRO–CRIMPER III Hand Tool Assembly 318451–1
Figure 4
5. INSPECTION
5.1. Visual Inspection
The crimping dies should be inspected on a regular
basis to ensure that they have not become worn or
damaged. Inspect the crimping chambers for
flattened, chipped, worn, or broken areas. If damage
or abnormal wear is evident, the tool must be
replaced. See Section 8, DIE REPLACEMENT.
5.2. Periodic Inspection
A. Center Contact Crimp Height Inspection
This inspection requires the use of a micrometer with
a modified anvil as shown in Figure 5. Tyco
Electronics recommends the modified micrometer
(Crimp Height Comparator RS–1019–5LP), which can
be purchased from:
Proceed as follows to check the crimp height of the
center contact:
Shearer Industrial Supply Co.
1. Select the center contact for the connector.
2. Refer to Section 4, CRIMPING PROCEDURE,
and crimp the center contact accordingly.
3. Using a crimp height comparator, measure the
crimp height as shown in Figure 5. If the crimp
height conforms to that shown, the die assembly is
considered dimensionally correct. If not, return the
dies to Tyco Electronics for evaluation and repair
(refer to Section 8, DIE REPLACEMENT).
Cross–Sectional
View
Connector Shoulder
Against Edge of Die
717–767–7575
or
610–691–3205
VALCO
Anvil Die
408–4217
3 of 5