CTE701 3M, CTE701 Datasheet - Page 2
CTE701
Manufacturer Part Number
CTE701
Description
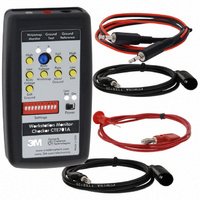
WORKSTATION MONITOR CHECKER
Manufacturer
3M
Series
ScanEM® Probesr
Type
Monitorr
Datasheet
1.CTE701.pdf
(4 pages)
Specifications of CTE701
Description/function
Workstation Monitor Checkers
For Use With/related Products
Workstation, Wrist Straps
Lead Free Status / RoHS Status
Contains lead / RoHS non-compliant
Features
-
Power Supply Type
-
Lead Free Status / Rohs Status
Lead free / RoHS Compliant
Other names
51111161982
80000919490
SCP265
XA004143203
80000919490
SCP265
XA004143203


2
Thank you for purchasing Workstation Monitor Checker. With it, you will always
know whether your workstation monitors and ground monitors operate within
your specification parameters.
Workstation Monitor Checker model CTE701 is designed to verify proper opera-
tion of your dual wriststrap monitors, workstation monitors and ground monitors.
Checker simulates proper resistances and signals so that you can see whether the
response of your monitors complies with your specification.
Though the Checker has been designed to work mostly with Credence Technolo-
gies’ monitors, such as WS Aware
Man and Ground Man Plus, it is also able to verify the performance of most
workstation and ground monitors on the market.
Checker presents certain loads and signals to the monitor that simulate specific
parameters of ground connections and wriststraps.
monitors have the same features.
What is included
Each workstation monitor Checker includes:
Workstation Monitor Checker model CTA701A
9V Alkaline Battery
Battery comes already installed in the Checker.
Ground Cable (banana to alligator clip)
Ground Monitor Cable (banana to pin)
3.5mm Male-to Male cable
This User’s Guide
®
, Ground Master
®
, Iron Man Plus, Ground
Please note that not all
1ea.
1ea.
1ea.
1ea.
1ea.
1ea.
Wriststraps
The Checker verifies proper operation of monitors of dual wriststraps, i.e. the
wriststraps that use two connections to an operator.
Setup
The Checker applies resistance of a certain value across the wriststrap terminal
input in order to simulate a wriststrap. In critical environments where the wriststrap
monitor is used the electrical resistance of an operator is specified to be 10MOhms
max. A good quality dual wriststrap has a1MOhm resistor in each half. It is up to
the user whether to account for these resistors or not. In case you account for these
resistors, then your limit would be:
10MOhms +1 MOhm + 1MOhm = 12 MOhms.
Limit is set by dip switch #10
Resistance, MOhms
Resistance, MOhms
Resistance, MOhms
Resistance, MOhms
Resistance, MOhms
Checker by default provides selected resistance plus 1MOhm, i.e. for 12MOhms
limit, it would provide 13MOhms, for 10MOhms limit it would provide 11MOhms.
When the Pass button is pressed, the Checker provides resistance 1MOhm less
than the limit, i.e. 11 and 9 MOhms accordingly.
Procedure
Body Voltage
Quality wriststrap monitors can detect excessive voltage that an operator may
develop as a result of movement-caused tribocharge and touching energized ob-
jects. To test this ability of the monitor, first set the body voltage threshold by
depressing the Body Voltage button and turning the blue potentiometer while mea-
suring the voltage on the tip of the 3.5mm plug vs. ground. Red and green LEDs
alternatively blink indicating positive and negative voltage applied automatically.
Your wriststrap monitor must react to both polarities of excessive voltage on the
operator.
Keep in mind that the voltage applied directly to the terminal of the monitor is 1/2
of the voltage on the operator due to 1M resistors in the wriststrap. Set Body
Voltage on the Checker slightly higher than your monitor is calibrated for. For
example, if your monitor is calibrated to 2.5V body voltage, depress Wriststrap
and Body Voltage High buttons simultaneosly and set your Checker to 1.35V
which is slightly higher than 1/2 of 2.5V. Your Checker can be set up to 5V.
your monitor. At this point the monitor should indicate failure.
connection.
Connect 3.5mm test cable to both the Checker and to Operator jack of
Depress the “Wriststrap” button. Your monitor should indicate good
Follow instructions in Basics
12
10
10
10
10
10.
Switch P
Switch P
Switch Position
Switch P
Switch P
Basics
Basics
Basics
Basics section
1 0
1 0
1 0
1 0
1 0
0
1
osition
osition
osition
osition
7