702560 Spectrum Digital Inc, 702560 Datasheet - Page 13
702560
Manufacturer Part Number
702560
Description
XDS560R USB JTAG Emulator With 20 Pin CTI JTAG Header
Manufacturer
Spectrum Digital Inc
Type
USB JTAG Emulatorr
Specifications of 702560
Contents
Board, Cable
Ic Product Type
USB JTAG Emulator
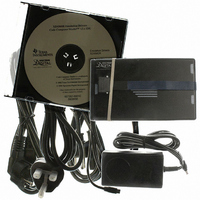
Kit Contents
XDS560R USB JTAG Emulator With CTI JTAG Header, CDROM With Drivers, USB Cable
Lead Free Status / RoHS Status
Lead free / RoHS Compliant
For Use With/related Products
TI DSPs and JTAG Microcontrollers
Lead Free Status / RoHS Status
Lead free / RoHS Compliant


2.2 Installing the XDS560R JTAG Emulator
2.2.1 XDS560R USB Installation Checklist
Target Cable Connectors:
This section contains the steps for installing the XDS560R JTAG Emulator.
Do not connect or disconnect the emulator tail while the target system is powered up.
The following section provides instructions to install XDS560R using the USB interface.
To install the XDS560R JTAG emulator using the USB interface execute the following
checklist:
❏
❏
❏
❏
❏
❏
Be very careful with the target cable connectors. connect them gently; don’t force
them into position, or you may damage the connectors.
blinking slowly and LED 1-3 should begin sequencing. At this point the XDS560R has
the AC power cord.
XDS560R located at the rear of the emulator. when power is connected the “PWR”
led on the XDS560R should iulluminate. After about 3 seconds LED 0 should begin
gone through it’s power on self-test, entered boot mode and is ready for USB
enumeration.
configuration should now look like that in Figure 2-1or Figure 2-2. Now connect the
XDS560R to your PC using the supplied USB cable. At this point led 0 should begin
blinking at a faster rate and windows will launch its “Add New Hardware Wizard” and
prompt for the location of the XDS560R drivers. Follow the instructions in the Quick
Start Guide for the software tools you are using.
to the target board
Turn off the power to your target board.
Connect the supplied USB cable to your PC or laptop. If you connect the USB cable
Connect the included +5V power adapter brick to your wall AC power source using
Apply power to the XDS560R by connecting the power brick to the +5V input on the
Make sure your driver CD-ROM is installed in your CD-ROM drive. Your system
Now connect the tail of the emulator to the header on your target board. Apply power
to a USB hub be sure the hub is connected to the PC or laptop and power is applied
to the hub.
WARNING !
Spectrum Digital, Inc
2-3
Related parts for 702560
Image
Part Number
Description
Manufacturer
Datasheet
Request
R

Part Number:
Description:
XDS560R Target Adapter Cable For 14 Pin JTAG Header
Manufacturer:
Spectrum Digital Inc
Datasheet:

Part Number:
Description:
MODULE EVAL FOR DM355
Manufacturer:
Spectrum Digital Inc
Datasheet:
Part Number:
Description:
DMC550 Digital Motor Controller For EZdsps
Manufacturer:
Spectrum Digital Inc
Part Number:
Description:
DMC1500 Digital Motor Controller For Switch Reluctance Motors
Manufacturer:
Spectrum Digital Inc
Part Number:
Description:
DMC1500 Digital Motor Controller For AC Induction/DC Brushless Motors
Manufacturer:
Spectrum Digital Inc
Datasheet:
Part Number:
Description:
TMS320DM357 Digital Video Evaluation Module 270 MHz TMS320DM357
Manufacturer:
Spectrum Digital Inc
Part Number:
Description:
EVM TMS320DM6467 Digital Video Development Platform
Manufacturer:
Spectrum Digital Inc


Part Number:
Description:
KIT STARTER DSP FOR C6416T
Manufacturer:
Spectrum Digital Inc
Datasheet:

Part Number:
Description:
CODE COMPOSR STUDIO EZDSP F28335
Manufacturer:
Spectrum Digital Inc
Datasheet:

Part Number:
Description:
EMULATOR C2000 SRS XDS510LC JTAG
Manufacturer:
Spectrum Digital Inc
Datasheet:

Part Number:
Description:
EMULATOR XDS510 USB JTAG 14PIN
Manufacturer:
Spectrum Digital Inc
Datasheet:

Part Number:
Description:
EMULATOR XDS510 USB PLUS W/CABLE
Manufacturer:
Spectrum Digital Inc
Datasheet:

Part Number:
Description:
EMULATOR XDS560R USB JTAG 14PIN
Manufacturer:
Spectrum Digital Inc
Datasheet: