VNCLO-PSU-USA FTDI, Future Technology Devices International Ltd, VNCLO-PSU-USA Datasheet - Page 12
VNCLO-PSU-USA
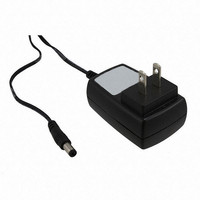
Manufacturer Part Number
VNCLO-PSU-USA
Description
POWER SUPPLY FOR VNCLO-MB1A USA
Manufacturer
FTDI, Future Technology Devices International Ltd
Series
Vinculor
Specifications of VNCLO-PSU-USA
Accessory Type
Power Supply
Lead Free Status / RoHS Status
Lead free / RoHS Compliant
For Use With/related Products
FTDI Vinculo Boards
Other names
768-1092


Document Reference No.: FT_000332
AN_153 Vinco LCD Interface Example
2.0
Version
`
Clearance No.: FTDI# 177
5
Programming Vinco
When Vinco has been connected to the LCD panel and the firmware has been built in the IDE, the next
step is to transfer the .ROM file generated by the IDE to the Vinco module. The IDE generates the .ROM
file with a single button click of the “Build” button.
Connect the USB port of the VNC2 Debug Module to a PC and load the free FTDI drivers for the FT232R
device on the debug module. This will happen automatically via Windows Update if you are connected to
their internet. Otherwise refer to the installation guide for your OS:
http://www.ftdichip.com/Support/Documents/InstallGuides.htm
The IDE should now automatically detect the VNC2 debug module.
Connect the other end of the VNC2 Debug Module to the J8 connector of the Vinco.
Use the IDE FLASH button to load the .ROM file into the Vinco. A getting started guide for using the
Vinculum IDE may be downloaded from:
http://www.ftdichip.com/Support/Documents/AppNotes/AN_142_Vinculum-
II_Tool_Chain_Getting_Started_Guide.pdf
The IDE will report back a successful programming. At this point the VNC2 Debug module may be
removed from the Vinco J8 connector.
The .rom file can also be downloaded from the following location:
http://www.ftdichip.com/Support/SoftwareExamples/VinculumIIProjects/Vinco_LCD.zip
Copyright © 2010 Future Technology Devices International Limited
11
Related parts for VNCLO-PSU-USA
Image
Part Number
Description
Manufacturer
Datasheet
Request
R

Part Number:
Description:
POWER SUPPLY FOR VNCLO-MB1A EU
Manufacturer:
FTDI, Future Technology Devices International Ltd
Datasheet:
Part Number:
Description:
POWER SUPPLY FOR VNCLO-MB1A UK
Manufacturer:
FTDI, Future Technology Devices International Ltd
Datasheet:

Part Number:
Description:
Interface Modules & Development Tools Vinculo Motherboard Req VNC2DEBUGMODULE
Manufacturer:
FTDI
Datasheet:

Part Number:
Description:
Interface Modules & Development Tools Vinculo Prototyping Shield Accessory
Manufacturer:
FTDI
Datasheet:
Part Number:
Description:
KIT, DEV, VINCULUM-II, VNC2
Manufacturer:
FTDI
Datasheet:

Part Number:
Description:
IC USB TO SERIAL UART 32-QFN
Manufacturer:
FTDI, Future Technology Devices International Ltd

Part Number:
Description:
IC USB HOST CTLR VINCULUM 48LQFP
Manufacturer:
FTDI, Future Technology Devices International Ltd
Datasheet:

Part Number:
Description:
IC USB HOST VINCULUM-II 32QFN
Manufacturer:
FTDI, Future Technology Devices International Ltd
Datasheet:
Part Number:
Description:
IC USB HOST VINCULUM-II 32LQFN
Manufacturer:
FTDI, Future Technology Devices International Ltd
Datasheet:
Part Number:
Description:
IC USB HOST VINCULUM-II 48QFN
Manufacturer:
FTDI, Future Technology Devices International Ltd
Datasheet:
Part Number:
Description:
IC USB HOST VINCULUM-II 32LQFN
Manufacturer:
FTDI, Future Technology Devices International Ltd
Datasheet:
Part Number:
Description:
IC USB HOST VINCULUM-II 32QFN
Manufacturer:
FTDI, Future Technology Devices International Ltd
Datasheet:
Part Number:
Description:
IC USB HOST VINCULUM-II 48LQFP
Manufacturer:
FTDI, Future Technology Devices International Ltd
Datasheet:
Part Number:
Description:
IC USB HOST VINCULUM-II 48LQFP
Manufacturer:
FTDI, Future Technology Devices International Ltd
Datasheet:
Part Number:
Description:
IC USB HOST VINCULUM-II 48QFN
Manufacturer:
FTDI, Future Technology Devices International Ltd
Datasheet: