8846A/SU 120V Fluke Electronics, 8846A/SU 120V Datasheet - Page 36
8846A/SU 120V
Manufacturer Part Number
8846A/SU 120V
Description
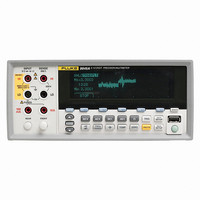
PREC MLTMTR 6.5DIGI USB W/SFTWRE
Manufacturer
Fluke Electronics
Type
Digital (DMM)r
Specifications of 8846A/SU 120V
Includes
Test Leads
Style
Bench
Display Digits
6.5
Display Type
VFD, Dual
Display Count
Varies
Function
Voltage, Current, Resistance, Capacitance, Temperature, Frequency
Functions, Extra
Continuity, dB, Diode Test
Features
Memory, RS-232, USB Port
Ranging
Manual
Response
Average
Lead Free Status / RoHS Status
Contains lead / RoHS compliant by exemption
Other names
2675344
614-1003
614-1003


8845A/8846A
Users Manual
2-4
Selecting the Line Voltage
Replacing the Fuses
Line-Power Fuse
does not match the power the Meter will be plugged into, then the Meter’s line voltage
setting must be changed and the line fuse possibly replaced.
The Meter will operate on any one of four different input line voltages. The set line
voltage is visible through the window in the line fuse holder, found on the Meter's rear
panel.
To change the line voltage:
1. Remove the power cord from the Meter.
2. Insert a small screwdriver blade in the narrow recess to the left of the fuse holder and
3. Remove the voltage selector block from the fuse holder.
4. Rotate the selector block until the preferred voltage rating faces outward.
5. Replace the selector block back into the fuse holder.
Changing the line voltage setting may require a different line-power fuse for proper
operation. Check Table 2-1 for the appropriate fuse for the selected line voltage.
With the voltage set and appropriate fuse installed, replace the fuse holder back into the
Meter and reconnect the power cord.
The Meter employs fuses to protect both the line-power and current measurement inputs.
The Meter has a line-power fuse in series with the power supply. Table 2-1 indicates the
proper fuse for each of the four line voltage selections. This fuse is located on the rear-
panel.
To replace this fuse:
1. Unplug the power cord from the Meter.
2. Remove the fuse holder by inserting a small screwdriver blade in the narrow recess to
3. Remove the fuse and replace with one rated appropriately for the selected line-power
4. Replace the selector block back into the fuse holder.
To avoid electric shock or fire, do not use makeshift fuses or
short-circuit the fuse holder. Use only Fluke fuses
pry to the right until the holder pops out, as shown in Figure 2-1.
the left of the fuse holder and pry to the right until the holder pops out as shown in
Figure 2-1. The Meter is shipped with a replacement fuse of the same rating as the
fuse installed in the fuse block.
voltage. See Table 2-1.
XW Warning