400293 Bergquist, 400293 Datasheet - Page 4
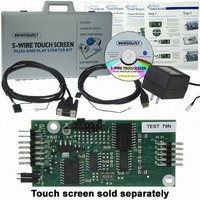
400293
Manufacturer Part Number
400293
Description
KIT STARTER FOR TOUCH SCREEN MOD
Manufacturer
Bergquist
Specifications of 400293
Sensor Type
Touch Screen
Interface
USB, PS/2, or Serial (RS-232)
Voltage - Supply
5 V ~ 24 V
Embedded
No
Utilized Ic / Part
500499
Lead Free Status / RoHS Status
Lead free / RoHS Compliant
Sensitivity
-
Sensing Range
-
Other names
BER245


CONFIGURE CALIBRATION OPTIONS:
1. Click the “Calibration” tab. The Calibration screen will appear (see Figure 9).
2. Click “Configure. ” The Calibration Options screen will appear (see Figure 10).
3. Select the calibration type and offset options:
4. Click “OK” to return to the Calibration screen when finished selecting options.
CALIBRATION ROUTINE:
1. Click on the large calibration target (see Figure 10) to begin the calibration process.
2. As each target appears on screen (see Figure 11), touch and hold the center of
IN-PROCESS CALIBRATION TEST:
Refer to Figure 12.This is the last screen displayed in the calibration process.
1. Touch the screen and notice if the calibration target is displayed under your finger
4 - Touch Screen Controller User's Guide
The calibration targets have been specially developed to assist you in calibrating
The Calibration screen will automatically time out and return you to the Control
the target until it shrinks and the word “Hold” is replaced by the word “Release”.
or stylus.
3-Point Calibration - Quick calibration of a known good touch screen overlay.
No correction is applied.
4-Point Calibration - Compensates for skew, and some edge linearity anomalies.
7-Point Calibration - Provides a more accurate calibration than 3-point. No
correction is applied.
20-Point Calibration - Provides the highest level of touch screen linearization and
skew correction.
Calibration Offset - Because of the varied linearity that exists between touch
screens, you may want to calibrate the edges of the touch screen more precisely.
Experiment with this setting to find the best result.
your touch screen as accurately as possible. Make sure to touch the center of
each target as accurately as possible.
Panel if the first point is not touched within 10 seconds.This is a time-out feature
that has been added to the calibration program.
If the target appears directly under your finger, click the “Accept” button. If the
target does not appear directly beneath your finger or stylus, click the “Cancel”
button, reconfigure your calibration options, and recalibrate until you get an
acceptable calibration.You may adjust the “Offset, ” or try the 4-point and/or
20-point calibration.
continued
Figure 11
Figure 12
Figure 10
Figure 9
Related parts for 400293
Image
Part Number
Description
Manufacturer
Datasheet
Request
R

Part Number:
Description:
THERMAL PAD TO-220 .009" SP1000
Manufacturer:
Bergquist
Datasheet:

Part Number:
Description:
BOARD LED IMS SEOUL SEMI Z-PWR
Manufacturer:
Bergquist
Datasheet:

Part Number:
Description:
BOARD LED IMS GOLDEN DRAGON
Manufacturer:
Bergquist
Datasheet:

Part Number:
Description:
BRD STAR LED IMS LUMEX SML-LX
Manufacturer:
Bergquist
Datasheet:

Part Number:
Description:
BRD STAR LED IMS LITE-ON LOPL
Manufacturer:
Bergquist
Datasheet:

Part Number:
Description:
BRD STAR LED IMS LUXEON K2
Manufacturer:
Bergquist
Datasheet:

Part Number:
Description:
BRD STAR LED IMS GOLDEN DRAGON
Manufacturer:
Bergquist
Datasheet:

Part Number:
Description:
BOARD LED IMS CREE X-LAMP
Manufacturer:
Bergquist
Datasheet:

Part Number:
Description:
BRD STAR LED IMS AVAGO MOONSTONE
Manufacturer:
Bergquist
Datasheet:

Part Number:
Description:
BRD STAR LED IMS LUXEON REBEL
Manufacturer:
Bergquist
Datasheet:


Part Number:
Description:
LAMP INCAND T3.25 GLSS WEDGE 28V
Manufacturer:
JKL Components Corp.
Datasheet:

Part Number:
Description:
Soldering Tools Weller Sponge/Tray Kleen-tip
Manufacturer:
Apex Tool Group (Formerly Cooper Tools)

