MIKROE-415 mikroElektronika, MIKROE-415 Datasheet - Page 7

MIKROE-415
Manufacturer Part Number
MIKROE-415
Description
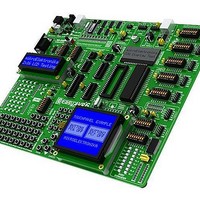
Development Boards & Kits - AVR EASYAVR6 DEVELOPMENT SYSTEM
Manufacturer
mikroElektronika
Datasheet
1.MIKROE-415.pdf
(28 pages)
Specifications of MIKROE-415
Tool Type
AVR Development Board
Interface Type
RS-232, USB, JTAG UART
Dimensions
265 mm x 220 mm
Operating Supply Voltage
9 V to 32 V
Lead Free Status / Rohs Status
Details
EasyAVR6 Development System
EasyAVR6 Development System
2.0. Supported Microcontrollers
The EasyAVR6 development system provides eight separate sockets for AVR microcontrollers in DIP40, DIP28, DIP20, DIP14 and
DIP8 packages.The development system
AVR microcontrollers can use either built-in (internal) or on-board (external) oscillator as a clock signal source. The clock oscillator
provided on the board generates clock signals for most supported microcontrollers.
- Microcontrollers plugged into the DIP8A socket use built-in oscillator for clock generation and are not connected to the on-board oscillator.
- Microcontrollers plugged into the DIP8B socket may use either internal or external oscillator, which depends on the jumper J10 position.
Prior to plugging the microcontroller into the appropriate socket, make sure that the power supply is turned off. Figure 2-2 shows
how to correctly plug a microcontroller into the appropriate socket. Figure 1 shows an unoccupied DIP40 socket. Place one end of
the microcontroller into the socket as shown in Figure 2. Then put the microcontroller slowly down until all the pins thereof match
the socket as shown in Figure 3. Check again that everything is placed correctly and press the microcontroller easily down until it is
completely plugged into the socket as shown in Figure 4.
NOTE:
Figure 2-1: Microcontroller sockets
Figure 2-2: Plugging microcontroller into appropriate socket
1
Only one microcontroller may be plugged into the development board at the same time.
The development system EasyAVR6 comes with the microcontroller in a DIP40 package.
comes with the microcontroller in a DIP40 package.
There are two sockets for AVR microcontrollers in DIP40, DIP20 and
DIP8 packages provided on the board. Which of these sockets will
you use depends solely on the pinout of the microcontroller in use.
Jumpers J10, J11 and J20 next to the sockets DIP28 and DIP8
are used for selecting functions of the microcontroller pins:
Jumper
3
J10
J20
J11
Position
VCC
PB3
CLK
PC7
CLK
PB6
PB3 is an I/O pin
Pin PB3 is fed with a clock signal from
the on-board oscillator
Pin is connected to VCC
PC7 is an I/O pin
Pin PB6 is fed with a clock signal from
the on-board oscillator
PB6 is an I/O pin
4
Function
MikroElektronika
7


