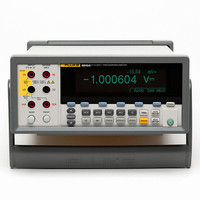
8845A/SU 120V Fluke Electronics, 8845A/SU 120V Datasheet - Page 58

8845A/SU 120V
Manufacturer Part Number
8845A/SU 120V
Description
PREC MLTMTR DMM BNCH 6.5 DIG RES
Manufacturer
Fluke Electronics
Type
Digital (DMM)r
Specifications of 8845A/SU 120V
Includes
Test Leads
Style
Bench
Display Digits
6.5
Display Type
VFD, Dual
Display Count
Varies
Function
Voltage, Current, Resistance, Frequency
Functions, Extra
Continuity, dB, Diode Test
Features
Memory, RS-232
Ranging
Manual
Response
Average
Lead Free Status / RoHS Status
Contains lead / RoHS compliant by exemption
Other names
2675292
614-1001
614-1001
8845A/8846A
Users Manual
3-16
Controlling Trigger Functions
Choosing a Trigger Source
In addition to the bar graph, the left third of the display also displays the number of
samples, the average, and standard deviation values.
To start a histogram session:
1. Set up the Meter for the desired measurement by selecting the function, and
2. With the Meter taking measurements, press J.
3. Press HISTOGRAM to start the session.
The display will start adjusting the bar graph as the number of readings accumulates. The
mean and standard deviation values also change in accordance with the collected
readings.
To start the histogram session over, press the STOP soft key followed by the
RESTART soft key.
To stop the histogram session, press B or the STOP soft key.
The Meter’s trigger functions allows you to select a measurement trigger source, set the
number of measurements (samples) per trigger, and set the delay time between receiving
the trigger and the start of a measurement. In addition, the trigger function provides a
“measurement complete” signal on the trigger port on the rear panel. See item 5 in
Table 3-3. Triggering the Meter remotely through one of its communication interfaces is
covered in the Programmers Manual. The following sections discuss triggering the Meter
automatically (internal trigger), or externally using the trigger key on the front panel and
the trigger connector on the rear-panel.
Setup and control of the trigger function is accessible through the Meter’s Measurement
Setup key L.
There are four possible sources for triggering a Meter measurement: automatic, front
panel trigger key W, external, and remote. With the exception of remote triggering,
trigger source selection is through the trigger menu, found under the measurement setup
menu.
To select a trigger source:
1. Press L to see the measurement setup menu.
2. Press the TRIGGER soft key to reveal the trigger control selections.
connecting the signal to the Meter’s input.
F1
Figure 3-2. Histogram Display
F2
F3
F4
F5
caw056.eps


