ZEN-10C2AR-A-V2 Omron, ZEN-10C2AR-A-V2 Datasheet - Page 81
ZEN-10C2AR-A-V2
Manufacturer Part Number
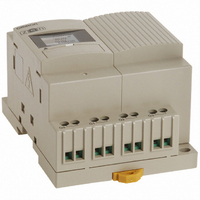
ZEN-10C2AR-A-V2
Description
100/240 VAC 6 IN, 4 OUT
Manufacturer
Omron
Series
ZEN V2r
Type
Expandabler
Datasheets
1.ZEN-BAT01_OMS.pdf
(37 pages)
2.ZEN-SOFT01-V4.pdf
(35 pages)
3.ZEN-10C1DR-D-V2.pdf
(61 pages)
4.ZEN-10C1DR-D-V2.pdf
(194 pages)
Specifications of ZEN-10C2AR-A-V2
Voltage - Supply
100 ~ 240VAC
Number Of I /o
6 Input, 4 Output
Display Type
LED
Output Type
Relay
Voltage Rating
100 V to 240 V
Input Type
AC
Lead Free Status / RoHS Status
Lead free / RoHS Compliant
Kit Contents
-
Analog Inputs
-
Lead Free Status / Rohs Status
Lead free / RoHS Compliant
Other names
Z2680
ZEN10C2ARAV2
ZEN10C2ARAV2


3-2
Setting the Date and Time
58
Precautions for Correct Use
Select SET
CLOCK.
Setting the Date and Time
The date and time are not set when the product is shipped. The date and
time must be set before the ZEN can be used. LED-type CPU Units (ZEN-
@0C2@@-@-V2) do not have a calendar and clock function.
If the power supply is turned OFF for two days or more at 25°C, the
date and time will return to the default setting (00/1/1; 00:00 (SA)).
SET CLOCK
yy/mm/dd
00/01/01
SET CLOCK
yy/mm/dd
00/01/0
SET CLOCK
yy/mm/dd
00/04/01
PROGRAM
RUN
PARAMETER
SET CLOCK
SET CLOCK
SUMMER TIME
SET CLOCK
00:03(SA)
00:03(SA)
11:35(SU)
SET?
11:35(SU)
OK/ESC
▼
change from a highlighted
cursor to a flashing cursor
and enable data to be
changed.
Set the date and time.
Use the Up/Down Buttons to change the
setting.
Use the Left/Right Buttons to move the
cursor.
The day will automatically change when the
date is set.
Press the OK Button to display a
confirmation message.
Press the OK Button to confirm and
complete the setting.
Press the OK Button to display the submenu
for clock settings. Select SET CLOCK from
the submenu.
Press the OK Button to display the current
date and time settings. The right digit of the
date will be highlighted and flashing.
Current time: hh:mm (day)
Current date: yy/mm/dd
Press the OK Button to
Days of the week
SU: Sunday
MO: Monday
TU: Tuesday
WE: Wednesday
TH: Thursday
FR: Friday
SA: Saturday
Section 3-2
Related parts for ZEN-10C2AR-A-V2
Image
Part Number
Description
Manufacturer
Datasheet
Request
R

Part Number:
Description:
Controller; Zen Starter Kit, DC Model, Version 2
Manufacturer:
Omron Automation
Datasheet:

Part Number:
Description:
Programmble Controller Relay
Manufacturer:
Omron
Datasheet:
Part Number:
Description:
G6S-2GLow Signal Relay
Manufacturer:
Omron Corporation
Datasheet:
Part Number:
Description:
Compact, Low-cost, SSR Switching 5 to 20 A
Manufacturer:
Omron Corporation
Datasheet:
Part Number:
Description:
Manufacturer:
Omron Corporation
Datasheet:
Part Number:
Description:
Manufacturer:
Omron Corporation
Datasheet:
Part Number:
Description:
Manufacturer:
Omron Corporation
Datasheet:
Part Number:
Description:
Manufacturer:
Omron Corporation
Datasheet:
Part Number:
Description:
Manufacturer:
Omron Corporation
Datasheet:
Part Number:
Description:
Manufacturer:
Omron Corporation
Datasheet: