9946 3M, 9946 Datasheet - Page 16
9946
Manufacturer Part Number
9946
Description
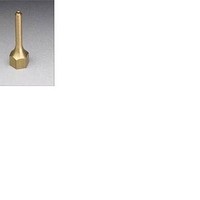
Soldering Tools .072 HOT MELT TIP SCOTCH WELD 3PC BAG
Manufacturer
3M
Type
Brass Extension Tipr
Datasheet
1.9946.pdf
(26 pages)
Specifications of 9946
Tip Size
0.072 mm
Product
Soldering Tips
Lead Free Status / Rohs Status
Lead free / RoHS Compliant
Other names
021200-22040
Available stocks
Company
Part Number
Manufacturer
Quantity
Price
Company:

Part Number:
994684-3
Manufacturer:
TE/AMP
Quantity:
30 000


B. Regulator Kit
First follow “Handle Disassembly Instructions,”
Procedure A on page 13. Then remove the two large
Phillips head screws to the rear of the wire terminals on
the right hand side of the handle. This allows the
regulator assembly to swing free, connected only by
the hose going from the brass rear of the regulator to
the loading chamber assembly, and then main hose
assembly. Remove the main hose by unscrewing the
elbow fitting from the regulator. Use a 5/16’’ wrench
to remove the loading chamber hose from the regulator.
Reassemble with a new regulator using reverse
procedure. Be sure hose fittings are quite snug. Check
for air leaks by activating the regulator. Once this is
done, reassemble the handle and heat shield.
© 3M 2006
Disconnect air and electrical power and make sure
applicator is at room temperature before servicing
3M™ Scotch-Weld™ Hot Melt Applicator PG II LT.
Failure to disconnect air and electrical power before
servicing may cause electrical shock or damage to the
applicator.
!
Caution
Follow “Handle Disassembly Instructions,” Procedure
A on page 13. Remove the main hose by unscrewing
the elbow fitting from the air regulator. Cut the cable
ties holding the power cord and hose assembly
together. Remove the hose and reconnect the new hose
using reverse procedure. Add new cable ties to the hose
and power cord.
3M Scotch-Weld Hot Melt Applicator PG II LT
must be warm prior to repairing nozzle valve.
Nozzle valve assembly consists of the nozzle tip and
the nozzle valve. Remove the old valve assembly using
a 5/8’’ open-end wrench. Replace with new assembly.
Gently snug up the valve assembly. With a 1/2’’
wrench, also snug up the new tip.
D. Hose Kit
C. Valve Kit
Contact with molten adhesive or hot applicator tip or
metal components may cause burns. Wear heat-
resistant gloves and safety glasses when operating or
repairing the 3M Scotch-Weld Hot Melt Applicator
PG II LT.
Disconnect air and electrical power and make sure
applicator is at room temperature before servicing 3M
Scotch-Weld Hot Melt Applicator PG II LT. Failure to
disconnect air and electrical power before servicing
may cause electrical shock or damage to the
applicator.
!
!
Repair Procedures
Caution
Caution
14