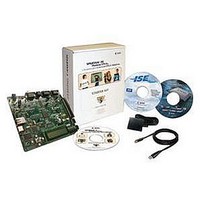
HW-SPAR3E-SK-UK-G Xilinx Inc, HW-SPAR3E-SK-UK-G Datasheet - Page 53

HW-SPAR3E-SK-UK-G
Manufacturer Part Number
HW-SPAR3E-SK-UK-G
Description
KIT STARTER SPARTAN-3E
Manufacturer
Xilinx Inc
Specifications of HW-SPAR3E-SK-UK-G
Tool / Board Applications
General Purpose MCU, MPU, DSP, DSC
Development Tool Type
Hardware / Software - Starter Kit
Mcu Supported Families
Spartan-3E
Lead Free Status / RoHS Status
Lead free / RoHS Compliant
Other names
HW-SPAR3E-SK-US-UK-G
HW-SPAR3E-SK-US-UK-G
HW-SPAR3E-SK-US-UK-G
Available stocks
Company
Part Number
Manufacturer
Quantity
Price
- Current page: 53 of 166
- Download datasheet (8Mb)
Spartan-3E FPGA Starter Kit Board User Guide
UG230 (v1.2) January 20, 2011
Transferring 8-Bit Data over the 4-Bit Interface
Initializing the Display
R
Power-On Initialization
Display Configuration
The data values on SF_D<11:8>, and the register select (LCD_RS) and the read/write
(LCD_RW) control signals must be set up and stable at least 40 ns before the enable LCD_E
goes High. The enable signal must remain High for 230 ns or longer—the equivalent of 12
or more clock cycles at 50 MHz.
In many applications, the LCD_RW signal can be tied Low permanently because the FPGA
generally has no reason to read information from the display.
After initializing the display and establishing communication, all commands and data
transfers to the character display are via 8 bits, transferred using two sequential 4-bit
operations. Each 8-bit transfer must be decomposed into two 4-bit transfers, spaced apart
by at least 1 μs, as shown in
the lower nibble. An 8-bit write operation must be spaced least 40 μs before the next
communication. This delay must be increased to 1.64 ms following a
command.
After power-on, the display must be initialized to establish the required communication
protocol. The initialization sequence is simple and ideally suited to the highly-efficient 8-
bit
for more complex control or computation beyond simply driving the display.
The initialization sequence first establishes that the FPGA application wishes to use the
four-bit data interface to the LCD as follows:
•
•
•
•
•
•
•
•
•
After the power-on initialization is completed, the four-bit interface is now established.
The next part of the sequence configures the display:
•
•
•
PicoBlaze
Wait 15 ms or longer, although the display is generally ready when the FPGA finishes
configuration. The 15 ms interval is 750,000 clock cycles at 50 MHz.
Write SF_D<11:8> = 0x3, pulse LCD_E High for 12 clock cycles.
Wait 4.1 ms or longer, which is 205,000 clock cycles at 50 MHz.
Write SF_D<11:8> = 0x3, pulse LCD_E High for 12 clock cycles.
Wait 100 μs or longer, which is 5,000 clock cycles at 50 MHz.
Write SF_D<11:8> = 0x3, pulse LCD_E High for 12 clock cycles.
Wait 40 μs or longer, which is 2,000 clock cycles at 50 MHz.
Write SF_D<11:8> = 0x2, pulse LCD_E High for 12 clock cycles.
Wait 40 μs or longer, which is 2,000 clock cycles at 50 MHz.
Issue a
Spartan-3E Starter Kit board.
Issue an
increment the address pointer.
Issue a
cursor and blinking.
Function Set
Display On/Off
Entry Mode Set
embedded controller. After initialization, the PicoBlaze controller is available
command, 0x28, to configure the display for operation on the
www.xilinx.com
Figure
command, 0x0C, to turn the display on and disables the
command, 0x06, to set the display to automatically
5-6. The upper nibble is transferred first, followed by
Clear Display
Operation
53
Related parts for HW-SPAR3E-SK-UK-G
Image
Part Number
Description
Manufacturer
Datasheet
Request
R

Part Number:
Description:
KIT STARTER SPARTAN-3E
Manufacturer:
Xilinx Inc
Datasheet:

Part Number:
Description:
KIT STARTER SPARTAN-3E
Manufacturer:
Xilinx Inc
Datasheet:

Part Number:
Description:
KIT DEV SPARTAN3E DISPLAY
Manufacturer:
Xilinx Inc

Part Number:
Description:
KIT DEV SPARTAN3E DISPLAY
Manufacturer:
Xilinx Inc
Datasheet:

Part Number:
Description:
IC CPLD .8K 36MCELL 44-VQFP
Manufacturer:
Xilinx Inc
Datasheet:

Part Number:
Description:
IC CPLD 72MCRCELL 10NS 44VQFP
Manufacturer:
Xilinx Inc
Datasheet:

Part Number:
Description:
IC CPLD 1.6K 72MCELL 64-VQFP
Manufacturer:
Xilinx Inc
Datasheet:

Part Number:
Description:
IC CR-II CPLD 64MCELL 44-VQFP
Manufacturer:
Xilinx Inc
Datasheet:

Part Number:
Description:
IC CPLD 1.6K 72MCELL 100-TQFP
Manufacturer:
Xilinx Inc
Datasheet:

Part Number:
Description:
IC CR-II CPLD 64MCELL 56-BGA
Manufacturer:
Xilinx Inc
Datasheet:

Part Number:
Description:
IC CPLD 72MCRCELL 7.5NS 44VQFP
Manufacturer:
Xilinx Inc
Datasheet:

Part Number:
Description:
IC CR-II CPLD 64MCELL 100-VQFP
Manufacturer:
Xilinx Inc
Datasheet:


