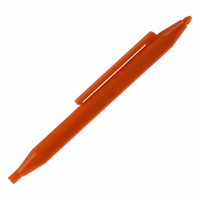
Y92S-38 Omron, Y92S-38 Datasheet - Page 13

Y92S-38
Manufacturer Part Number
Y92S-38
Description
LOCK KEY PEN FOR H3DS RELAYS
Manufacturer
Omron
Series
H3DSr
Specifications of Y92S-38
Accessory Type
Tool - Lock Key Pen
For Use With/related Products
H3DS Series
For Use With
H3DS-SLCAC24-230/DC24 - TIMER CAGE CLAMP 17.5MM 4MODESH3DS-MLCAC24-230/DC24-48 - TIMER CAGE CLAMP 17.5MM 8MODESZ2395 - RELAY TIME DELAY 4MODE DIN MNTZ2394 - RELAY TIME DELAY 1MODE DIN MNTZ2393 - RELAY TIME DELAY 8MODE DIN MNTZ2392 - RELAY TIME DELAY 1MODE DIN MNT
Lead Free Status / RoHS Status
Lead free / RoHS Compliant
Color
-
Lead Free Status / Rohs Status
Lead free / RoHS Compliant
Other names
Y92S38
Z2396
Z2396
H3DS
I
A flat-blade screwdriver should be used to install the cables.
Applicable Screwdriver
G Flat-blade, Parallel-tip, 2.5 mm diameter
Examples:FACOM AEF.2.5 × 75E
VESSEL No. 9900-(-)2.5 × 75
WAGO 210-119
WIHA 260/2.5 × 40
I
Applicable Wire Sizes
0.2 to 1.5 mm
Applicable Wire Type
Solid wires, stranded wires, flexible wires, or wires with
ferrules can be used.
(See note 1) < 1.8 ≤ Diameter D (mm) ≤ 3.0 (See Note 2.)
Conductor diameter d (mm) or length of sides a and
b (mm) ≤ 1.6
Note: 1. If the overall diameter of the wire is less than
I
Use wires of the applicable sizes specified above. The length
of the exposed conductor should be 6 to 7 mm.
• Flat-blade, Parallel-tip
• Flat-blade, Flared-tip
OK
Wires with Ferrules
Wiring
Tools
Applicable Wires
Fig. 1 Exposed Conductor Length
2.5 dia.
2. If the overall diameter of the wire is over 2.8 mm,
1.8 mm, do not insert the wire past the conductor.
Refer to the following diagrams.
it will be difficult to use double wiring.
2
, AWG24 to AWG16
Cannot be used.
NG
6 to 7 mm
Use the following procedure:
1. Insert the specified screwdriver into the release hole located
2. Insert the exposed conductor into the wire connection hole.
Wiring Precautions
Always insert the screwdriver straight into the hole, never at an
angle. The clamp spring may bend if the screwdriver is not
straight.
3. Pull out the screwdriver.
Do not move the screwdriver side to side in the clamp hole. The
clamp spring may bend if the screwdriver is moved sideways.
Wire
connection
holes
Release
holes
Fig. 2 Wire Connection Holes and Release Holes
Fig. 3 Section A-A of Fig. 2
beside the wire connection hole where the wire is to be inserted.
Wire connection hole
Release hole
Screwdriver
Insert
A
A
Insert
Insert
Pull out
H3DS


