DV164120 Microchip Technology, DV164120 Datasheet - Page 19
DV164120
Manufacturer Part Number
DV164120
Description
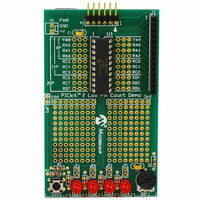
KIT STARTER PICKIT 2
Manufacturer
Microchip Technology
Series
PICkit™ 2r
Type
Microcontrollerr
Datasheet
1.PG164120.pdf
(86 pages)
Specifications of DV164120
Contents
Board, PICkit™ 2 Programmer, Cable, CD
Processor To Be Evaluated
PIC family
Data Bus Width
8 bit, 16 bit, 32 bit
Core Architecture
PIC
Ic Product Type
Programmer
Kit Contents
Hardware, Cables, Literature And Software
Ic Interface Type
USB
Supported Families
PICmicro
Rohs Compliant
Yes
Development Tool Type
Hardware / Software - Starter Kit
Lead Free Status / RoHS Status
Lead free / RoHS Compliant
For Use With/related Products
PIC Micro® MCU
Lead Free Status / Rohs Status
Lead free / RoHS Compliant
For Use With
8/14/20-pin PICmicros
Lead Free Status / RoHS Status
Lead free / RoHS Compliant, Lead free / RoHS Compliant
Available stocks
Company
Part Number
Manufacturer
Quantity
Price
Company:

Part Number:
DV164120
Manufacturer:
MICROCHIP
Quantity:
12 000


2.1
2.2
© 2008 Microchip Technology Inc.
INTRODUCTION
INSTALLING THE PICkit 2 HARDWARE
Chapter 2. PICkit 2 Programmer Getting Started
This chapter gives instruction on how to get started using the PICkit 2 Development
Programmer/Debugger to program Flash-based PIC microcontroller units.
For information on how to use the PICkit 2 with In-Circuit Serial Programming™
(ICSP™), refer to Chapter 3. “Using In-Circuit Serial Programming™ (ICSP™)”.
For information on how to update the PICkit 2 operating system (firmware), refer to
Chapter 6. “Updating the PICkit 2 Operating System”.
For information on using the PICkit 2 as a debugger in MPLAB IDE, see Chapter
4. “PICkit 2 Debug Express”.
•
•
•
•
•
•
•
•
•
•
•
To install the PICkit 2 hardware:
• Plug one end of the USB cable into PICkit 2 USB connector. Plug the other end
• Connect the PICkit 2 to a target board via a 6-pin connector. The target board can
• Do not connect the PICkit 2 to a target board that has its own power supply if it is
• To connect the PICkit 2 to a target with an MPLAB ICD 2 style RJ-11 connector,
When plugging the PICkit 2 into the USB, it is recommended to disconnect it from any
target board first. Similarly, when starting up or rebooting the host PC, ensure it is
disconnected from a target.
For more information about the PICkit 2 hardware, see Section 1.3 “PICkit 2
Development Programmer/Debugger”.
Installing the PICkit 2 Hardware
Installing and Launching the PICkit 2 Programmer Application
Connecting to the Device
Selecting Target Power
Importing a Hex File
Writing the Program to the Device
Verifying the Device
Reading Device Memory
Code Protecting the Device
Erasing and Blank Checking the Device
Automating Write/Read Procedures
into a USB port on your PC.
be the included demo board or any target equipped with the appropriate 6-pin
connector.
not connected to a powered USB port.
the AC164110 RJ-11 to ICSP Adapter kit is required.
PICkit™ 2 USER’S GUIDE
DS51553E-page 15
Related parts for DV164120
Image
Part Number
Description
Manufacturer
Datasheet
Request
R

Part Number:
Description:
Manufacturer:
Microchip Technology Inc.
Datasheet:
Part Number:
Description:
Manufacturer:
Microchip Technology Inc.
Datasheet:
Part Number:
Description:
Manufacturer:
Microchip Technology Inc.
Datasheet:
Part Number:
Description:
Manufacturer:
Microchip Technology Inc.
Datasheet:
Part Number:
Description:
Manufacturer:
Microchip Technology Inc.
Datasheet:
Part Number:
Description:
Manufacturer:
Microchip Technology Inc.
Datasheet:
Part Number:
Description:
Manufacturer:
Microchip Technology Inc.
Datasheet:
Part Number:
Description:
Manufacturer:
Microchip Technology Inc.
Datasheet: