NT20S-KBA01 Omron, NT20S-KBA01 Datasheet
NT20S-KBA01
Specifications of NT20S-KBA01


Related parts for NT20S-KBA01


NT20S-KBA01 Summary of contents
Page 1
NT-series Programmable Terminal Operation Manual Cat. No. V020-E3-2 ...
Page 2
iv ...
Page 3
... The abbreviation “PC” means Programmable Controller and is not used as an abbreviation for anything else. The abbreviation “Host” means PC that controls NT20S. Visual Aids The following headings appear in the left column of the manual to help you locate different types of in- formation ...
Page 4
vi ...
Page 5
... SECTION 1 Functions of the NT20S 1-1 Role and Operation of NT20S 1-2 Functions of NT20S . . . . . . . . . . . . . . . . . . . . . . . . . . . . . . . . . . . . . . . . . . . . . . . . . . . . . ...
Page 6
... NT20S Status Control 5-5 Notification of the Operating Status to the PC (Determining the NT20S Operating Status) SECTION 6 Using the RS-232C Table of Commands . . . . . . . . . . . . . . . . . . . . . . . . . . . . . . . . . . . . . . . . . . . . . . . . . . . . . ...
Page 7
... C. Handling the RS-232C/RS-422A Converter Unit D. NT20S Installation Environment E. NT20S Internal Processing . . . . . . . . . . . . . . . . . . . . . . . . . . . . . . . . . . . . . . . . . . . . . . . . . F. Function Restrictions Depending on the Support Tool G ...
Page 8
x ...
Page 9
... About this Manual: This manual describes the basic functions and operation procedures of the NT-series programmable ter- minal NT20S, its operations when connected Host, and includes the sections described be- low. Please read this manual carefully and be sure you understand the information provided before attempting to install and operate the NT-series programmable terminal NT20S ...
Page 10
... S NT Series Support Tool Ver.2j Operation Manual (V028-E1-j) The screens displayed on the NT20S are created with the support tool and trans- ferred to the NT20S. This manual describes how to create and transfer screen data. ...
Page 11
This section provides general precautions for using the Programmable Terminal. The information contained in this section is important for the safe and reliable application of the Programmable Terminal. You must read this section and understand the information contained before attempting ...
Page 12
... You must consult with your OMRON representative before applying Programmable Terminals to the abovementioned applications. WARNING Do not use input functions such as PT touch switches for applications where dan- ger to human life or serious damage is possible, or for emergency switch applica- tions ...
Page 13
... Turn off the power before replacing the backlight. Otherwise you could sustain an electric shock. CAUTION: If the DIP switch settings have been changed when the NT20S is powered, reset the power to the NT20S. The changes with the DIP switches become effective only after the power supply is reset. ...
Page 14
... S Direct exposure to wind and rain (outdoor sites) S Strong ultra-violet irradiation Take adequate measures to ensure shielding if the NT20S is used at a location subject to any of the following conditions. S Static electricity, or noise from other equipment S Strong electric or magnetic fields S Nearby power cables S Potential exposure to radioactivity S Do not install at a site exposed to chemicals, steam, etc, or subject to excessive airborne dust ...
Page 15
S Always turn off the power at the PC and PT before connecting the C200H inter- face cable. Otherwise the system may operate unpredictably. If the actual character string is longer than the specified character string length, the specified number ...
Page 16
xviii ...
Page 17
... NT20S is a new programmable terminal (PT) which incorporates a host interface unit and a RS-232C interface unit in a pro- grammable terminal body. It can be easily installed and used. This section gives the operation examples and characteristics of the NT20S so that you will understand the applications of the NT20S ...
Page 18
... The NT20S warns of system or equipment failures and prompts the appropriate remedial action. Panel Switch Functions Setting touch switches on the NT20S allows workers to use the NT20S as an oper- ating panel. Production data input to the NT20S or the Host can be transmitted to a PC. 2 Production Control ...
Page 19
... Data input through a touch panel can be sent to a Host. Touch panel Screen Data The screen data to be displayed on the NT20S can be created by a computer by using support tools. Connect the NT20S to a PC/AT with an RS-232C cable so that the screen data are transferred to the NT20S. ...
Page 20
... Features Downsized Body S The NT20S has the thinnest depth ( less in the panel) in the NT series. S The width is shorter by 30 mm, maintaining the existing display area. S The system keys and tool connectors are located at other than the front side. S The communication cable connectors are housed in the unit so that they do not protrude from the unit ...
Page 21
... Functions of NT20S Touch Switch Operation The System Menu can be displayed by using the touch switches located in four corners of the screen. Compatibility with NT20M Existing screen data, user programs, are compatible. Section 1-2 5 ...
Page 22
... Other Functions S Buzzer A built-in buzzer can be used. S Communications with connecting the NT20S with a PC using the host link, NT link, C200H, or RS-232C communication method, data can be received from the host and touch switch status information can be sent to the host. S System function The system setting and maintenance can be executed by using the Sys- tem Menu on the screen ...
Page 23
... Functions of NT20S 1-2-3 Comparison between NT20S and NT20M The NT20S is a unitary PT which incorporates a system ROM, screen memory, and a host I/F unit (Host link, NT link, RS-232C, and C200H direct communication) as the standard equipment in one body. The NT20S has the following features which are different from those of existing NT20M ...
Page 24
... NT20S-ST161 are absolutely identical and therefore if you are using an NT20S-ST161 please refer to the explanations for the NT20S-ST121. S The only way in which NT20S-ST168 differs from NT20S-ST128 is that the dis- play is a monochrome liquid crystal display. Functionally, the NT20S-ST128 and NT20S-ST168 are absolutely identical and therefore if you are using an NT20S-ST168 please refer to the explanations for the NT20S-ST128 ...
Page 25
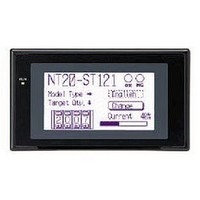
... Functions of NT20S 1-2-5 Displays The NT20S can display various kinds of elements such as characters, lamps, touch switches, and bar graphs on a screen. The screen data displayed on the NT20S are created by using support tools on a computer. Characters (character string) Machine name Characters (text) Production qty ...
Page 26
... NT20S-ST122-V1) The principal optional devices for NT20S are as follows; Replacement backlight NT20S-CFL01 (one white light) Anti-glare sheet NT20M-KBA04 (five sheets in a pack) Chemical-resistant cover (made of silicone rubber) NT20S-KBA01 1-3-1 Host Link/NT Link (1:1)/C200H direct Systems D When using host link/NT ...
Page 27
... System Configuration 1-3-2 NT Link (1:N) Systems When NT20S is connected 1:N connection, use an RS-232C cable and RS-422/485 cables. PLEASE NOTE: The second digit DM Setting to set signifies the max. # for 1:N NT Link of PT Nodes for 1:N NT Link. C200HX Setup e. Nodes Com 06 Port Nodes ...
Page 28
... This function allows to read the information to be displayed on the NT20S from the memory area in the PC and to write it to the memory table in the NT20S. Also, the data input on the NT20S can be written to the PC’s memory area. The NT20S screen status can be switched according to the PC’ ...
Page 29
... PC memory. Bits and words in the PC can be referenced from any memory table. S The NT20S can directly refer to PC bit and word data so that it can be connected without changing the PC program which controls currently running pro- duction line ...
Page 30
... This means that the unused bits of words allocated to touch switches can be used for other applications (for example, lamp allocations). Since the C200H direct communication function is compatible with the host link, the NT20S screen data and PC programs for host link direct connection can also be communicated by C200H direct communication without alteration. Caution: ...
Page 31
... Memory tables Lamps and touch switches System control S Notifying from the NT20S Data in the NT20S is sent when a touch switch is pressed. The following types of data are sent to a PC. - NT20S status - Touch switch status - Numerical values input with touch switches by using the numeral setting func- ...
Page 32
... Touch switch NT20S 12 Bit 009012 Bit 009012: ON Numeral memory NT20S table 1 (TIM003) Numeral memory table 150 (0005CH) NT20S Character-string memory table 1 Allocated word number: 3ch First word: DM0100 Section 1 (“a”, “b”) (“c”, “d”) ...
Page 33
... Functions of the PT Status Notify Area (NT20S to PC) The “PT status notify area” is used to notify the changes of the NT20S status. When a change is made in the NT20S status, the change is written to this area in the PC. By reading the data from the area, the NT20S status can be checked. ...
Page 34
... Notification of the NT20S operation contents to the Host. Terminal commands Terminal commands are used to use the NT20S as a display terminal of the Host. When the NT20S is used as a display terminal, it can display characters and fig- ures in accordance with instructions given by the Host, independently of the screens registered to the NT20S. ...
Page 35
... Before Operating 1-7 Before Operating Follow the procedure given below to start the system of the NT20S. Host Check and change the Host settings. S For the host link, refer to page 36 and the manuals for the host link unit and peripheral tools. S For the NT link (1:1), refer to page 47 ...
Page 36
Before Operating Refer to the following manuals for the equipment and software. Equipment or Software Support tools NT-series Support Tool Operation Manual PCs SYSMAC C20H/C28H/C40H/C60H Operation Manual (Programming/RS-232C Interface) SYSMAC C120/C500 User’s Manual (Programming) SYSMAC C200H Operation Manual SYSMAC C200HS ...
Page 37
... This section describes the settings of the NT20S, connections to a Host, and other hardware settings. 2-1 Description of Parts and Settings 2-1-1 Description of Parts 2-1-2 Operation Status DIP Switch Settings 2-1-3 Setting the Communication Condition Setting Switches (NT20S-ST122-V1 Only) 2-2 Installation . . . . . . . . . . . . . . . . . . . . . . . . . . . . . . . . . . . . . . . . . . . . . . . . . . . . . . . . . . . . . . . . . . ...
Page 38
... DIP switches on the NT20S. 2-1-1 Description of Parts Front View RUN LED Lit when the unit is in RUN mode. Reference: The NT20S comes in two body colors. S NT20S-ST12j: beige S NT20S-ST12jB: black 22 POWER LED Lit when the power is supplied. Display An STN LCD screen with a backlight. The whole area of the screen is a touch panel which works as an input device ...
Page 39
... Host I/F tool connector Connect the cable here from a PC/Host or support tool. (On the NT20S-ST122-V1 this connector is for connection to a host only.) Section 2-1 The NT20S-ST122-V1 has the support tool connector and communication condition setting switches under this cover ...
Page 40
... SW2-2 SW2-3 SW2-4 CAUTION: If the DIP switch settings have been changed when the NT20S is powered, reset the power to the NT20S. The changes with the DIP switches become effective only after the power supply is reset. Reference addition to the DIP switches, set also the “communication type”, “host link baud rate” ...
Page 41
... Setting the rotary switch The rotary switch is used to set the unit number. Since the NT20S-ST122-V1 serves as a C200H special I/O unit, it requires a unit number setting. Make sure the set unit number does not duplicate the unit number set for any other special I/O unit. ...
Page 42
... Reference “8” or “9” is set as the unit number when using CjjH, a special I/O unit error will occur. S When an NT20S-ST122-V1 is connected to a CjjH, I/O extension units can- not be connected. In other words not possible to connect another special I/O unit, so whatever unit number is set will not duplicate an existing one. ...
Page 43
... Installation 2-2 Installation Install the NT20S to the operation panel and connect the power to the NT20S as described below. 2-2-1 Installation Environment Observe the following points when installing the operation panel. Caution: Do not install the NT20S at sites subject to the following conditions. Otherwise, the product may malfunction. ...
Page 44
... The panel must not be soiled or warped, and must be able to support an installation that will remain secure and strong. (1) Open a hole, shown below, in the panel and install the NT20S from the front (2) Attach the panel fittings at four positions, shown below, on the rear side of the ...
Page 45
... S If complying with EC directives (low voltage directives), use a power supply with reinforced insulation. Reference: When using an NT20S-ST122-V1, the NT20S must be started up before the host. For details, refer to “Switching the Power ON/OFF When Using C200H Direct” (page 62). When not using C200H direct communication, there are no restrictions on the order in which power supplies are switched ON and OFF ...
Page 46
Installation S Parts used for connection Caution: For the connection to the power supply terminal block, twisted wires greater cross sectional area and M3.5 size crimp terminals must be used. Tighten the screws on the terminal block ...
Page 47
... Connecting to the Support Tool 2-3 Connecting to the Support Tool Connect the NT20S to a computer with an RS-232C cable to transfer the screen data created by using a support tool to the NT20S. An NT20S-ST121-EV3/ST128 cannot be connected to both a personal computer running the support tool and a Host at the same time. Connect the personal com- puter only when transmitting screen data ...
Page 48
... When making a connection, check the series and model of the PC to which the connection is being made, and the type of host link unit that is installed. The follow- ing is a list of the PCs that can be connected to the NT20S via a host link. Units with Built-in Host Link Function ...
Page 49
... CV500-LK201 £ Connection is not possible to the CPU units of CVM1/CV series PCs that do not have the suffix “-EV In the case of these CPU units, make the connection to NT20S by using a host link unit. CPU Units Connectable Using an CPU Units Connectable Using an Expansion Communication Board ...
Page 50
... Otherwise a discontinuity may occur, causing operation to fail. Connecting with a 25-pin Connector Use a connector cable with a 25-pin connector on one end and a 9-pin connector on the other end (NT20S side) to connect the NT20S with a 25-pin connec- tor. 9-pin connector Use the following recommended cables (OMRON); ...
Page 51
... Set the I/O port selector switch to the RS-232C side (upper side) to use this port. RS-422A Connecting the NT20S Series CQM1 Unit CQM1 can connect to the NT20S by the RS-232C method. Use an RS-232C 9-pin type connector cable connect to the RS-232C port This is a 9-pin RS-232C connector. Use a connector cable with a 9-pin connec- tor on both ends ...
Page 52
... PC Switch Settings When the NT20S and PC are connected to each other, set the conditions at the PC host link unit or the CPU as given in the table below. The following is a general description of switch settings. Refer to the manual for respective units for the details of the switch settings. ...
Page 53
Connection the Host Link Connecting to a Host Link Unit Two types of host link units are available: a rack-mounting type and a CPU- mounted type. The switch settings differ according to the type of host ...
Page 54
Connection the Host Link [Setting the rear switches] I/O port RS-422A RS-232C Synchronization Internal External NO Termination resistance OFF ON CTS 0V External I/O port selection (selector switch) Set this to “RS-232C”. S ...
Page 55
Connection the Host Link S C500/C1000H/C2000(H) rack-mounting type: C500-LK203 [Setting the rear switches] 5V supply ON OFF I/O port RS-422A RS-232C Synchronization NO Internal External Termination resistance OFF ON CTS 0V External NO S I/O port ...
Page 56
Connection the Host Link S CPU-mounted type: C120-LK201-V1 [Setting the rear switches Unit #, parity, and transfer code (DIP SW1-1 to SW1-5) Set SW1-1 to SW1-5 to “OFF” (“0”). £ Parity is fixed at ...
Page 57
... Set the operating conditions with the PC System Setting functions when a CVM1/CV series host link unit is connected to the NT20S. The PC system settings can be made directly from the peripheral tool (LSS etc.) or the PC system setting information created with a peripheral tool can be transferred to the CPU. ...
Page 58
... S C-series CjjH, CVM1/CV-series (-EVj) Set the operating conditions with the PC System Setting functions when CVM1/CV-series host link unit is connected to the NT20S. The PC sys- tem settings can be made directly from the peripheral tool (LSS etc.) or the PC system setting information created with a peripheral tool can be transferred to the CPU ...
Page 59
... Unit # S C-series C200HS, C200HX/HG/HE, CPM1, CQM1 Set the operating conditions to the PC system setting area when a C200HS C200HX/HG/HE, CPM1 or CQM1 CPU is connected to the NT20S. The PC sys- tem setting area (data memory) can be directly accessed from the peripheral tool (LSS etc.). The following describes the switch settings enable the PC system set- tings ...
Page 60
Connection the Host Link S When using port A of C200HX/HG/HE S When using port B of C200HX/HG/HE S When using CPM1 44 Channel # Writing Value Host link mode DM6555 0001 Set the conditions with ...
Page 61
... When making a connection, check the series and model of the PC to which the connection is being made, and the type of host link unit that is installed. The follow- ing is a list of the PCs that can be connected to the NT20S via a host link. The compatible PCs are listed in the table below. ...
Page 62
... Otherwise the cably may disconnect, causing operation to fail. S The cable’s tensile load not subject it to loads greater than this. Otherwise a discontinuity may occur, causing operation to fail. Use a connector cable with a 9-pin connector on both ends to connect the NT20S with a 9-pin connector. 9-pin connector The following are the recommended cables (manufactured by OMRON) ...
Page 63
... Connection the NT Link (1:1) 2-5-3 PC Switch Settings When the NT20S and PC are connected to each other, set the conditions at the PC CPU enable the NT link communications. The following is a general description of switch settings. S C-series C200HS, C200HX/HG/HE, CPM1, CQM1 Set the operating conditions to the PC system setting area when a C200HS, C200HX/HG/HE, CPM1 or CQM1 CPU is connected to the NT20S ...
Page 64
Connection the NT Link (1:1) S CVM1/CV-series (-EVj) When connecting to a CVM1/CV-series (-EVj) CPU, set the switches as given below. When using CVM1/CV series, always set CPU execution processing (execution control 2) in the PC ...
Page 65
... C200HX/HG/HE models. When making a connection, check the series and model of the PC to which the connection is being made, and the type of host link unit that is installed. The following is a list of the PCs that can be connected to the NT20S via a host link (1:N). C series ...
Page 66
... Connection the NT Link (1:N) Connection Diagram As shown in the figure below, connect multiple NT20S units to one PC link (1:N eight NT20S units can be connected to one PC port. C200HX/HG/HE RS-232C cable (max. length: 2 m), or directly connected RS-422A/485 cable RS-422A/485 cable ( RS-232C/RS-422A converter unit, type NT-AL001 (Not required if the connection is made at the RS-422A/485 port ...
Page 67
Connection the NT Link (1:N) Converter Unit Connector Specifications The terminal block specifications of the RS-232C/RS-422A converter unit are indi- cated here. For details on the method for making the connection cable, refer to “Making the ...
Page 68
... Connection the NT Link (1:N) Wiring Method For the connections between the PC and NT20S units, wire as shown below. The wiring method differs depending on the cables used for connection. RS-422A connection S C200HX/HG/HE RS-232C cable (max. length: 2 m), or directly connected RS-422A cable RS-232C/RS-422A converter unit, ...
Page 69
Connection the NT Link (1:N) [RS-422A Cable Wiring ( S RS-232C connection at the PC side NT-AL001 RS-422A terminal block S RS-422A connection at the PC side PC RS-422A interface [RS-422A Cable Wiring ( NT-AL001 RS-422A ...
Page 70
... S NT-AL001 to NT-AL001 NT-AL001 RS-422A terminal block NT-AL001 PC RS-422A interface 54 OMRON PC While controlling machinery and monitoring lines, controls the NT20S units when necessary. C200H/HG/HE can be used. RS-232C/RS-422A RS-232C/RS-422A RS-232C/RS-422A converter unit, converter unit, converter unit, type NT-AL001 type NT-AL001 type NT-AL001 £ £ ...
Page 71
... RS-485 cable ( RS-232C cable (max NT20S Section 2-6 (End connection) RS-232C/RS-422A converter unit, type NT-AL001 £ ) RS-232C cable (max £ ) Total cable length: 500 m NT20S (End connection) RS-232C/RS-422A converter unit, type NT-AL001 £ £ ) Total cable length: 500m RS-232C cable (max NT20S 55 ...
Page 72
... RS-232C cable (max (max NT20S Section 2-6 (End connection) RS-232C/RS-422A converter unit, type NT-AL001 £ Total cable length: 500 m £ ) RS-232C cable (max NT20S (End connection) RS-232C/RS-422A converter unit, type NT-AL001 ( £ ) Total cable length: 500 m £ ) RS-232C cable (max NT20S ...
Page 73
... Connection the NT Link (1:N) 2-6-3 PC Switch Settings When the PC and NT20S units have been connected, set the switches at the CPU module at the PC side in order to enable communication using the NT link method series, C200HX/HG/HE Write the communication conditions directly to the “PC system area” (data memory) using a peripheral tool (e.g., SYSMAC support software). For details on the operation for setting the “ ...
Page 74
... Connect an NT20S-ST122-V1 and PC made by OMRON with an I/O cable. 2-7-1 Applicable PC Units Before making the connection, check the series and model of the PC to which the connection made. A list of the PCs that can be connected to an NT20S using C200H direct communication is presented below. C20H/C28HC40H/C60H C200H-CPU01-E ...
Page 75
... Otherwise a discontinuity may occur, causing operation to fail. Reference C200H-CNjjj or C20H-CNjjj is used as the I/O connection cable, the connector will project beyond the bottom face of the NT20S. If the I/O cable is passed through a hole or other opening, the hole or opening must be at least 53 mmφ. Removing the top cover reduces this requirement to 33 mmφ ...
Page 76
... I/O extension units is not possible. S Connection to a remote I/O slave station is not possible. S There is only one C200H interface unit interface connector. This means that it is not possible to connect an NT20S between a CPU unit and an I/O extension unit. It must be the final connection in the system. I/O connection cable ...
Page 77
... S A maximum of one CPU unit can be connected two I/O units can be connected for the one CPU unit, but I/O extension units cannot be connected not possible to connect a CjjH I/O unit after the NT20S. It must be the final connection in the system. I/O connection cable ...
Page 78
... Note the power to the NT20S is switched off first, the CPU of the PC is subjected to a system reset, making operations such as programming console impossible. S Switch off the system temporarily before replacing the NT20S (when a fault oc- curs, for example) ...
Page 79
... Refer to the appropriate instruction manuals for the method of setting the Host communication conditions. Set to the maximum baud rate supported by both the NT20S and Host. The communication condition settings of the NT20S-ST128 are set with the RS-232C communication conditions memory switches. For details, refer to “Set- ting RS-232C Communication Conditions” ...
Page 80
... RS-232C cable with 9-pin connectors at both ends. 9-pin connector Caution: S When making the connection, switch off the power to the NT20S and PC before disconnecting or connecting any connector. S After connecting the communication cable, always secure it with the screws. Otherwise the cable may disconnect, causing operation to fail. ...
Page 81
... This section describes the operation of the System Menu focusing on the procedure to start up the NT20S. Functions which will be convenient to use the NT20S and those which are useful for the system maintenance are also ex- plained here. 3-1 Operation Flow by the System Menu 3-2 Starting the NT20S ...
Page 82
... Follow the procedure below when using the NT20S for the first time or when changing the system. Create the Screen Data Create the screen data to be displayed on the NT20S by using a support tool. For the screen data creation, refer to the “NT-series Support Tool Operation Manu- al” (V028-E1-j). ...
Page 83
... Procedure 1. Turn ON the power to the NT20S. 2. Press appropriate touch switches to display the System Menu, and change Note: If the NT20S has failed to start up normally; an error message is displayed or no screen is displayed, memory needs to be initialized. For the memory initializing procedure, refer to Section 3-4 Initializing memory (page 72) ...
Page 84
... Operation modes and the System Menu 3-3 Operation Modes and the System Menu The NT20S operates in either “RUN”, “Transmit”, or “Maintenance” mode. The op- eration modes can be switched by using the System Menu. 3-3-1 System Menu and the Operation Modes Select an operation mode by pressing the corresponding touch switch in the Sys- tem Menu ...
Page 85
... Operation modes and the System Menu 3-3-2 Menu Tree The System Menu allows to effect various NT20S functions by using the touch switches. The NT20S’s functions with respect to the System Menu are related as shown below. For the operations with the System Menu, refer to the “Operations with the System Menu” ...
Page 86
... Displaying the System Menu Press appropriate touch switches to display the System Menu as mentioned be- low. The “RUN” LED goes off when the System Menu is displayed. The NT20S display screen has four touch switches to display the System Menu in the four corners (about size). Press any two of these switches at the same time to call the System Menu screen ...
Page 87
... Transmit Mode Maintenance Mode The MAINTENANCE MENU will be displayed to allow the main- Switching from the System Menu to the RUN mode The NT20S will exit the System Menu and switch to the RUN mode in the cases mentioned below. S Selecting “Quit” in the System Menu. ...
Page 88
... Initializing Memory 3-4 Initializing Memory If the NT20S is used for the first time or if the screen data is ruined and the NT20S cannot be normally started, the memory needs to be initialized. The memory initialization is required in the cases mentioned below. S When the NT20S is used for the first time or when an error message indicating that the screen data is ruined etc. when the NT20S is started. ➡ ...
Page 89
... No No direct information is set! After initialization of the screen data memory, the system enters the operation mode. At this point, nothing is displayed on the screen of the NT20S. Return to the System Menu, select the Transmit Mode, and transmit the screen data from the support tool. ...
Page 90
... Note: Be sure to turn the power OFF before setting the NT20S DIP switch. Set the DIP switch as follows to initialize the screen data memory. Operation 1. Set DIP SW2-1 on the NT20S to ON and turn the power ON or reset the Yes No 2. Turn the NT20S power to OFF. ...
Page 91
... This section describes the communications condition settings by using the memory switches. Memory Switches The NT20S has the memory areas used to store the PC connection method, com- munications conditions, system settings, etc. which can be used as the switches and called the “memory switches”. Since the memory switches use the flash memory, the stored data can be held even when the power supply is turned OFF ...
Page 92
... S Key Press Sound 3-8 Various System Settings (page 91) S Buzzer Sound S Backlight Off S Comm. Type S Baud Rate S Automatic Reset S Tool Mode [NT20S-ST122-V1 C200H] Key Sound Buzzer Sound Bk light Off Comm. Type Automatic Reset Tool Mode S Key Press Sound 3-8 Various System Settings (page 91) ...
Page 93
... Setting the Conditions of Communications with the PC/Host with Memory Switches [NT20S-ST128 RS-232C] Key Press Sound Buzzer Sound Bk light Off Automatic Reset S Key Press Sound 3-8 Various System Settings (page 91) S Buzzer Sound S Backlight Off S Automatic Reset S Data Bits S Stop Bits S Parity Check ...
Page 94
... Selecting the Host Communication Method (NT20S-ST121-EV3 only) The NT20S-ST121-EV3 can be connected the host link or the NT link. Either link can be selected by setting the “Comm. Type” memory switch. The facto- ry setting has been made to the “Host link”. Select the host communication method by the menu operation from the System Menu as mentioned below ...
Page 95
... Selecting the Host Link Communication Speed (NT20S-ST121-EV3 only) When using the NT20S-ST121-EV3 with the host link, the baud rate of the com- munications with the PC can be set. Use the “Baud Rate” switch and select 9600 bps or 19200 bps. The factory setting has been made at 9600 bps. ...
Page 96
... Setting the Conditions of Communications with the PC/Host with Memory Switches 3-5-3 Selecting Unit Numbers (NT20S-ST121-EV3 only) When using NT20S-ST121-EV3 with the NT link (1:N) communication method, set unit numbers. When using NT link (1:N), unit numbers are used to identify each of the multiple PTs connected to a single PC port. Set a different unit number for each of the PTs connected to the port ...
Page 97
Setting the Conditions of Communications with the PC/Host with Memory Switches MEMORY SW MENU Automatic Reset Unit No. To set and quit the menu, press the [WRT & EXIT] touch switch. To quit without setting, press [Quit]. The run mode ...
Page 98
... S Parity Check S Flow Control S Baud Rate Set the same communication conditions at the host and the NT20S. You are rec- ommended to set the highest baud rate that can be used by the host and NT20S. The factory settings are as follows: S Data Bits S Stop Bits ...
Page 99
... S LMP Bit Control Note: Use the same condition settings as set for the host recommended that the highest baud rate possible is selected for both the host and the NT20S. ➡ For details on lamp bit control, refer to Section 3-8 “Various System Settings” on page 91. ...
Page 100
Setting the Conditions of Communications with the PC/Host with Memory Switches 3-5-5 Selecting the Automatic Reset Function The “Automatic Reset” memory switch is used to set whether or not the commu- nication is automatically reset after the occurrence of a ...
Page 101
... Each time the “Automatic Re- (2/2) set” touch switch is pressed, the Quit setting option “Yes” alternates No with “No”. Page 9600bps (The figure to the left shows the NT20S-ST121-EV3 screen.) WRT& EXIT Section 3-5 85 ...
Page 102
... NT20S unit corresponds to the files created by using the support tool. Select a file which contains the screen data to be transmitted when selecting the screen data to be transmitted to the NT20S so that the required screen data can be transmitted to the NT20S. When the screen data is transmitted from the support tool to the NT20S, the screen data already existing in the NT20S will be erased ...
Page 103
... When screen data transmission is in screen units, if there is data other than screen data, for example memory table or direct access changes, transmit this data also. Reference: When screen data is transmitted to an NT20S written into a free area of the memory without overwriting the existing data. This means that if data transmis- sion in screen units is performed frequently, there will come a time when there is no more free area in the memory and further transmission is impossible ...
Page 104
... Registering the Screen Data Operation 1. Connect the NT20S which the support tool has been installed and 2. Turn ON the computer and start up the support tool. 3. Enter the “Transmit Mode” by operating the menu of the NT20S as mentioned [ SYSTEM MENU ] Quit Transmit Mode Maintenance Mode [ TRANSMIT MODE ] 4 ...
Page 105
... S The ESC key on the support tool is pressed to end the transmission. When the power to the NT20S is turned ON or reset, the screen data is checked. However, if any of the above occurs during the screen data transmission, the screen may disappear and other unexpected problems may occur. ...
Page 106
... Switching to the RUN mode Press the Quit touch switch in the System Menu. The start-up screen in the RUN mode will be displayed. If the NT20S has failed to start correctly; e.g., the start-up screen is not displayed, an error message is displayed, or the screen is not displayed at all, refer to Section 7-2 “ ...
Page 107
... Various System Settings 3-8 Various System Settings The NT20S can set a variety of functions to the memory switches which are conve- nient during the operation. This section describes the memory switch settings re- lated to the operation environment. 3-8-1 Setting the Key Press Sound Whether or not the key press sound is given when the NT20S touch switch is pressed can be set with the memory switch ...
Page 108
... To set the buzzer to sound in other cases, the follow- ing two procedures can be used. S Controlled by the Host It is possible to control the NT20S from the Host to sound the buzzer during the operation. Refer to Section 5-4 NT20S Status Control (page 191). ...
Page 109
... Repeatedly pressing the “Buzz- (1/2) er Sound” touch switch cycles Quit through the setting options Host Link “ON”, “ERR ON”, and “OFF”, in Page OFF that order. OFF (The figure to the left shows the None NT20S-ST121-EV3 screen.) WRT& EXIT NT20M Section 3-8 93 ...
Page 110
... Turning on the Backlight When a touch switch on the NT20S is pressed or a screen is switched or redis- played by the PC when the backlight is off by the backlight off function, the back- light will turn on. Any changes of numeric values or characters displayed on the screen will not effect the backlight to turn on again ...
Page 111
... In order to prevent this, either use the screen saver function or periodically switch screens. 3-8-4 Support Tool Mode Setting (NT20S-ST121-EV3/ST122-V1 Only) By setting “Tool Mode” to “NT20M”, the NT20M-ST121-EV3/ST122-V1 can be used in the same way as the conventional NT20M, and it becomes possible to use the NT20M/NT2000M/NT600M support tool (Ver.4.j). ...
Page 112
... Tool Mode To quit after setting the selected item, press the WRT & EXIT touch switch. To quit without setting, press the Quit touch switch. The NT20S will enter the RUN mode. S When “NT20M” is set, the NT20M compatible mode is established and the termi- nal can be used as an NT20M. S When “ ...
Page 113
... Various System Settings 3-8-5 Lamp Bit Control (NT20S-ST128) When using the NT20S-ST128 (using the RS-232C interface for communication with the host), you can select whether lamp statuses are controlled by bit designa- tion or not. The factory setting for this function is Enable (lamps numbered controlled by bits) ...
Page 114
Various System Settings Data Bits Stop Bits Parity Check Flow Control Baud Rate LMP Bit Control To set and quit the menu, press the [WRT&EXIT] touch switch. To quit without set- ting, press [Quit]. S When “Disable” is set, the ...
Page 115
... The NT20S has the self maintenance functions such as I/O check and setting sta- tus check. 3-9-1 I/O Check The I/O operations for the following items of the NT20S are checked by the I/O check function. S Touch Switch S Communications with the support tool S Communications with the Host (NT20S-ST128 RS-232C only) ...
Page 116
... Execute a NT20S-to-support tool communication check by the menu operation from the System Menu as mentioned below. The NT20S-ST121-EV3/ST128 uses the same connector for connection to the support tool and connection to the Host. If this connector is currently connected to the host, disconnect the cable from it and connect it to the support tool (personal computer) before attempting screen data transmission ...
Page 117
... Touch Switch Data Memory [ COMM. CHECK MENU ] Quit Tool I/F [ TOOL I/F INPUT CHECK ] When the check is finished, press the Exit touch switch. The NT20S will enter the I/O CHECK MENU. LCD Display Comm. Check EXIT Section 3-9 Select “Comm. Check”. ...
Page 118
... System Maintenance Checking the Communications with the Host (NT20S-ST128) Execute a NT20S-to-Host communication check by the menu operation from the System Menu as mentioned below. [ SYSTEM MENU ] Quit Transmit Mode Maintenance Mode [ MAINTENANCE MENU ] Quit PT Setting I/O Check Init. Memory Memory Switch [ I/O CHECK MENU ] ...
Page 119
... Data Memory S The LCD displays dots (segments of the screen) line by line beginning with the top left corner. If all the dots are displayed normally, the NT20S will enter the I/O CHECK MENU after all the dots have been turned off cancel the LCD indication check, press any touch switch (anywhere) on the screen ...
Page 120
... System Maintenance Checking the Buzzer Check the NT20S buzzer by using the menu operation from the System Menu as mentioned below. [ SYSTEM MENU ] Quit Transmit Mode Maintenance Mode [ MAINTENANCE MENU ] Quit PT Setting I/O Check Init. Memory Memory Switch [ I/O CHECK MENU ] Quit LED Check ...
Page 121
... Data Memory The “RUN” LED on the front face of the NT20S will flash. The “POWER” LED re- mains lit quit the LED check, press the “EXIT” touch switch. The NT20S will enter the I/O CHECK MENU. Select “Maintenance Mode”. ...
Page 122
System Maintenance Checking the Screen Memory Check the screen memory by using the menu operation from the System Menu as mentioned below. Reference: When the screen data memory is checked, the memory is initialized and all the screen data is ...
Page 123
... S If the memory check has been normally completed, the “Memory is OK” mes- sage will be displayed quit the memory check, press the “Cancel” touch switch. The NT20S will en- ter the I/O CHECK MENU the “Memory error!!” message is displayed, the screen data memory may have been used up to its service life or there may be a hardware fault ...
Page 124
... EXIT £ unit number is set at the PC, “0” will be displayed. S The current PT settings will be displayed. S Pressing the “EXIT” touch switch will exit the PT settings display, and the NT20S will return to the RUN Mode. 108 (NT Link (1:1 SETTING ] PT Control Area DM0000 ...
Page 125
... NT20S to enter the RUN mode. Note: If the DIP switch settings have been changed when the NT20S is powered, reset the power to the NT20S. The changes with the DIP switches become effective only after the power supply is reset. DIP-SW Status ...
Page 126
110 ...
Page 127
... This section describes the functions of the NT20S. 4-1 Creating and Transmitting Screen Data 4-1-1 Setting the support tool for use with the NT20S 4-1-2 Creating Screen Data 4-2 Outline of Functions . . . . . . . . . . . . . . . . . . . . . . . . . . . . . . . . . . . . . . . . . . . . . . . . . . . . . . . . . . ...
Page 128
... Support Tool Operation Manual” (V028-E1-j). 4-1-1 Setting the support tool for use with the NT20S To create the screen data for the NT20S, make settings with the support tool for use with the NT20S. To create the NT20S screen data, make settings in the “Tool Settings” screen as follows ...
Page 129
... Select “Tool Settings” in the Main Menu to display the “Tool Settings” screen. : 20S : Ver.4 or Ver.5 : NT20S : None Settings of PT setting, memory size, and direct setting are made in this screen. Refer to “Setting the support tool for use with the NT20S” on the previous page. Section 4-1 113 ...
Page 130
... Creating and Transmitting Screen Data ➡ Select a file used for storing the screen data for the NT20S in the “File List” Select “New File” and press [Enter]. Enter filename on completion of creation. Select a screen number to edit in the selected file in the “Screen List” screen. ...
Page 131
... S Bit In (YES/NO) S Keypad (Syst/User) S Backlight (ON/OFF) ➡ Bit input attributes can be set when using the NT20S-ST128 (RS-232C). Create screen data in the Edit screen. Data of one screen can be created by regis- tering (laying out) the following display elements and attributes on the screen. S Fix display: Input character strings and figure ...
Page 132
Creating and Transmitting Screen Data S Character string display: Set the character string memory table number and display method ...
Page 133
... Pressing the [F6] (Tmx.) key on the “File List” screen will cause the created screen data to be transmitted to the NT20S in file units. Pressing [F10] (Next) and then [F6] (Tmx.) on the “File List” screen will cause the screen data to be transmitted in screen units ...
Page 134
... Outline of Functions 4-2-1 NT20S Screen This section gives the outline of the screen which is the basis of all NT20S func- tions. For specific operation procedure such as screen switching, refer to “Switching the Screen Display” (page 157). The NT20S screen is composed of horizontal 256 dots x vertical 128 dots. Each Composition of the Screen dot is set by the combination of the X (horizontal) and Y (vertical) coordinates ...
Page 135
... The character and figure attributes can be set in the edit screen when creating the screen data by using the support tool. When using the NT20S-ST128 (RS-232C), character strings can also be dis- played in accordance with commands from the host, independently of the current- ly displayed screen (this is the “terminal function”). ...
Page 136
... The NT20S-ST121-EV3/ST122-V1 can communicate with the PC through the host link/NT link/C200H direct communication. Bits and words are allocated to areas of the PC memory (selectable without restriction) and the NT20S can write data to them or read from them directly. This makes the following functions pos- ...
Page 137
... Communication through RS-232C The NT20S-ST128 can communicate with the host through the RS-232C inter- face. In other words, it can receive and send commands through the RS-232C in- terface, which allows various types of host to utilize the functions of the NT20S: S Control/Notification of display elements S Control/Notification of the NT20S status ...
Page 138
... The details of each screen type are given below. Normal Screen A normal screen is the basic screen of the NT20S not necessary to select a screen type (overlapping or consecutive) when to create the screen data on a nor- mal screen. When a normal screen is selected, existing screens will be erased and a normal screen will be displayed ...
Page 139
... Only one numeral setting screen which allows numeric values to be set on the NT20S screen can be registered as a child screen. For the numeral setting, refer to Section 4-8 Numeral Setting (page 140). ...
Page 140
Screen Display [Example continuous screens] S Parent screen: #10 S Child screens: #20, #15, and #5 When screen #10 (continuous screen) is designated, screen #20 which is page 1 of the continuous screens will be displayed. Screen # ...
Page 141
... System: The numeric keys registered to the system are automatically dis- User: Reference: If the numeral setting attribute on the NT20S has been set for “system”, the touch switches [ENT], keys need to be created. (System key functions (page 139)) ...
Page 142
... When creating the screen data by using the support tool, set the position on the screen to display a character string and also set a character string number to be displayed. When the NT20S is operated, the screen displays the contents of the character- string memory table. When using Ver.5 direct connection possible to display the contents of charac- ...
Page 143
... Reverse and flashing display: 4-4-2 Numeral Memory Table The numeral memory table is an NT20S internal memory used to store the numer- al data 128 numeral memory tables can be used, and up to eight digits (four bytes) of numeral data (including signs) can be stored in one numeral memory table ...
Page 144
Memory Tables Numerals Which can be Displayed The power of expression of the screen can be increased by giving various attrib- utes such as the enlarged or reverse display to the numerals of the numeral memory table. The numeral attributes ...
Page 145
... Bar Graphs 4-5 Bar Graphs The contents of the numeral memory tables of the NT20S can be displayed as bar graphs as well as numeral data. This section describes the bar graphs which can be displayed. In order to change the data displayed in a bar graph, the contents of its numeral memory table have to be changed ...
Page 146
Bar Graphs S Orientation and incremental direction The orientation and incremental direction of the bar graph can be selected from those mentioned below. ↑ (up): ↓ (down):The bar graph increments downward in the vertical orientation. ← (left): The bar graph ...
Page 147
Bar Graphs [To display a value below 0 %: Sign display “Yes”] The bar graph is displayed in the range of --100 % to 100 %. The middle of the bar graph indicates 0 %. [Not to display a value ...
Page 148
Bar Graphs (3) When the absolute value of the % value is above 1000 % 132 When the frame is not displayed: % display 1-dot-wide space 999 % ↔ 100 % Sign display “Yes”: A value below --100 ...
Page 149
... Lamps 4-6 Lamps The NT20S has the “lamp” function used to simply display the PC bit status. This section describes the lamps which can be displayed. The lamp display status (lit (flashing) or unlit) can be changed by instructions from the PC/host. For details on how to change the status of a currently displayed lamp, refer to “ ...
Page 150
Lamps S Lit and flashing Select whether the lamp is lit (reverse display) or flashing (reverse flashing) when the lamp is turned ON by the PC. S Guide display message Lamps can be displayed with the guide display messages. The ...
Page 151
Lamps When a lamp is overlapped with a memory table display The guide display message for a lamp is a fixed character-string. If you want to change the lamp guide display in accordance with some condition, overlap the dis- play ...
Page 152
... Touch Switches The NT20S has a function whereby input operations can be performed by using touch panels displayed on the screen. NT20S screens can be switched, or bit in- formation sent to the Host, by pressing (lightly touching) the “touch switches” panel. The touch switches can also be made to light up (or flash) and go off like lamps. ...
Page 153
... Host. (RS-232C) NT20S-ST121-EV3/ST122-V1 :Host link/NT link/C200H direct communication (page 183) NT20S-ST128 :RS-232C (page 212) NT20S-ST121-EV3/ST122-V1 :Host link/NT link/C200H direct communication (page 188) NT20S-ST128 :RS-232C (page 212) Type of Display Switch OFF Frame Standard 3-D None Section 4-7 ...
Page 154
... A guide display message can be displayed at a touch switch location. 4-7-2 Screen Switching Function The NT20S has a function that allows screens to be switched by pressing touch switches on its screen, rather than by designation from the PC/Host. This function is called the “standalone function”. The screen number of the screen that will be displayed when a touch switch is pressed is set for that touch switch when the screen data is created using the sup- port tool ...
Page 155
... Numeral Setting 4-7-3 System Key Functions The NT20S allows the allocation of “system key” functions to touch switches. The system key functions can then be used during operation by pressing the touch switches to which they have been allocated. For example, if, when a screen for which buzzer sounding has been set is dis- played, a ing this touch switch ...
Page 156
... Numeral Setting 4-8 Numeral Setting The NT20S has a “numeral setting” function to enable numerical values to be input from the screen. This function inputs numerical values to numeral memory tables in response to touch switch operations, displays these numerical values on the screen, and sends them to the host. ...
Page 157
... Correct Use: In order to use the numerical value input setting safely, always use the upper/lower limit check function. Since this function is not featured with NT20S-ST128 and Ver.4 and previous versions of the direct connection function, take appropriate measures using the user application software. ...
Page 158
... A maximum of 50 input fields, including both numeric key and thumbwheel types, can be registered on one screen. The thumbwheel type of numeral setting can only be used when using Ver.5 direct connection with an NT20S-ST121-EV3/ST122-V1. Numeric Key Type When a numerical value is input using touch switches to which numeric key func- tions have been allocated, the input numerical value is displayed on the screen ...
Page 159
... A through F. With the NT20S, if the numeral setting attribute is set to “system”, apart from the numeric keys prepared by the system, the touch switches allocated to system keys ( S When the numeral setting attribute is “user” ...
Page 160
... When the touch switches allocated as numeric keys and system keys on a numer- al setting screen are pressed, no notification is made to the PC. This means that when using the NT20S-ST128 (RS-232C), the touch switches numbered 227 to 255 cannot be used as normal touch switches on a numeral setting screen. ...
Page 161
Numeral Setting 4-8-4 Using Numeric Keys To input numerical data by using numeric keys, first select the numeral setting area into which the value input, then input the numerical value by pressing the appropriate numeric keys. Selecting ...
Page 162
Numeral Setting Inputting Numerical Values Input numerical values using the following numeric keys (touch switches): numer- als ( F), decimal point (.), sign (+,--), clear (CLR), and return ( S Changing the sign When there is ...
Page 163
Numeral Setting 4-8-5 Using The Thumbwheel Type of Numeral Setting (Ver.5 Direct Connection Only) When using the thumbwheel type of numeral setting, numerical values are input by directly touching the incrementing/decrementing (+/--) keys. This type of input can only be ...
Page 164
Numeral Setting This is because if an attempt is made to change the leftmost digit from from upper/lower limit value check is always performed. In order to avoid this, either set the ...
Page 165
Numeral Setting S Shape (end plates) Set which of the two shapes shown below will be used. One has “end plates” at right and left sides and the other does not. S Restrictions on display attributes The following restrictions apply ...
Page 166
150 ...
Page 167
... Controllable NT20S Functions 5-4-2 How to Control NT20S Functions 5-5 Notification of the Operating Status to the PC (Determining the NT20S Operating Status) 5-5-1 Ascertainable NT20S Statuses (Notified Operating Statuses) 5-5-2 Reading the NT20S Operating Statuses How to Use the Host Link/NT Link ...
Page 168
... Allocatable Bits and Words When the host link/NT link is used, the following bits and words are allocated to the PC and used for the NT20S operation. The range of respective area varies with the type of PC. Refer to Appendix L PC Memory Map (page 278). The allocations must be made without exceeding respective area range. ...
Page 169
... The NT20S will operate as follows in the display element control operation. [NT20S operation] (1) The NT20S checks the allocation bits and words of the display elements and (2) The PC answers the NT20S about the bit and word data. (3) The NT20S changes the display status according to the bits and words ob- [NT20S operation example] makes an inquiry to the PC ...
Page 170
... Overview of Direct Connection Operations Controlling the NT20S Status by Using Allocated Bits and Words ..... PT Status Control Area (PC to PT) The PT status control area (PC to PT) is provided to control the NT20S status from the PC. When data is written to this area in the PC, the NT20S will read the data and operates according to the data ...
Page 171
... Notifying the Display Elements by Using Allocated Bits and Words The NT20S will operate as follows in the display element notification operation. [NT20S operation] The NT20S will write any changes in the contents of the numeral or character- string memory table being displayed or pressing of a touch switch to the bits and words area in the PC. ...
Page 172
... Overview of Direct Connection Operations Notifying the NT20S Status by Using Allocated Bits and Words ..... PT Status Notify Area (PT to PC) The PT status notify area (PT to PC) is provided to notify the NT20S status changes to the PC. When any NT20S status has changed, such change is written to this area in the PC, and the PC will read the data from this area to check the NT20S status ...
Page 173
... For this function, refer to the “Standalone Function“ (page 138). To switch the NT20S screen display by controlling from the PC, write a screen number at the “screen switch setting” in the PT status control area. [Screen switch setting in the PT status control area] ...
Page 174
... NT20S and eliminates re- peated setting of the same screen number. If the screen switching is not executed on the NT20S, the screen switching strobe does not need to be checked. For the screen switching strobe, refer to the “notifying the displayed screen to the PC” ...
Page 175
... PT status notify area. In this case, the NT20S will not write the same screen twice. Section 5-1 (1) Screen number Screen switch setting word (2) Screen number ...
Page 176
... PC) allocated to the PC. Screen switch notification: New screen number: By reading the currently displayed screen word when the screen switch strobe flag has turned ON, the number of the currently displayed screen on the NT20S is dis- played. [Currently displayed screen] and [PT status] words in the PT status notify area Use a 4-digit BCD (binary-coded decimal) value to set a screen number ...
Page 177
... Create a PC program to read the “currently displayed screen word” in the in the Reference: The contents of the “currently displayed screen word” are updated also by switch- ing the screen by pressing a touch switch on the NT20S. For this function (standalone function or screen switch function), refer to the “Stan- dalone Function” ...
Page 178
... PT status notify area: Word 0110 S PC ladder program 11212 Screen switch strobe flag S Program operation (1) When the NT20S screen display switches and the screen switch strobe flag (2) The new screen number notified by the NT20S is read and transferred to 162 @MOV(21) DM0100 DM0101 @MOV(21) 110 DM0100 (bit 11212) turns ON, the contents of DM0100 are transferred to DM0101 ...
Page 179
... Since the character-string memory tables can be allocated to the words in the PC, the PC can write data to the character-string memory tables or the initial values can be set when creating the screen data. Automatic updating is performed to ensure that the currently displayed NT20S character string memory table contents and PC word contents always match each other. ...
Page 180
Memory Tables and Bar Graphs This specification method is a little complex, but it allows the display to be changed more easily according to the circumstances. In the example above were add the contents of memory ...
Page 181
... numeral displays and 50 character string displays can be specified on one screen by using indirect specification. NT20S Direct Character string specification memory table NT20S Indirect Numeral specification memory table Character string memory table Section 5-2 ...
Page 182
Memory Tables and Bar Graphs This specification method is a little complex, but it allows the display to be changed more easily according to the circumstances. In the example above, if one were added to the contents of memory table ...
Page 183
Memory Tables and Bar Graphs 5-2-1 Displaying the Contents of Allocated Words of Memory Tables The relationship between the contents of the allocated words of numeral and char- acter string memory tables and the display is described below. S Contents ...
Page 184
Memory Tables and Bar Graphs [Numeral memory table display examples] S When the data are numeral data ( Start Start + 1 S When the data contain characters ( Start Start + 1 If the hexadecimal ...
Page 185
... To change the numerals or character strings displayed on the NT20S, make changes with the numeral or character-string memory table. To make changes with the numeral or character-string memory table of the NT20S, change the con- tents of words by the PC. Reference: This method is convenient when changing data has to be displayed: for example when monitoring the contents of PC words ...
Page 186
... Application Example of the Numeral Memory Tables Allocated to the PC Words This example gives the procedure to directly display the contents of the words allo- cated as the numeral memory tables in the PC memory. The NT20S screen dis- play will change as the contents of the PC word change. S Support tool settings Allocate the memory as shown below by using the support tool ...
Page 187
... Contents of Allocated Words ... Indirect Specifica- tion) The following explains how to change numerical values or character strings dis- played by the NT20S by changing the contents of the referenced allocated words using indirect specification. This method can only be used with Ver.5 of the direct connection function. ...
Page 188
Memory Tables and Bar Graphs Procedure 1. Set the PC area for allocation of the numeral memory table to be referenced in 2. When using the support tool to create screen data, register on the screen the 3. Use the ...
Page 189
... S Program operation (1) Each time contact 00100 comes ON, the display on the NT20S screen (2) Each time contact 00101 comes ON, the display on the NT20S screen In this example, the contents of numeral memory table number 51 referenced in indirect specification are not checked. Make sure that the contents of numeral memory table number 51 stay within the range of 0100 to 0103 when the program is actually used ...
Page 190
... Refer to “Changing Displayed Numerals or Character Strings” (page 169) explained before. To change the numerals or character strings displayed on the NT20S, copy the data between the numeral or character-string memory tables by using the “copy memory table setting” of the PT status control area. ...
Page 191
... First write the “copy destination memory table number”, and then, write the “copy source memory table number” to the PT status control area (PC to PT). The NT20S reads the area sometimes when the PC is writing the settings. If the “copy source memory table number” has been written first and is changed, unex- pected memory table may possibly be changed ...
Page 192
... Create a PC ladder program as follows: 09000 Error flag 09000 Error flag S Program operation (1) When an error occurs (bit 09000 turns ON), the NT20S displays the message (2) When the error is cleared (bit 09000 turns OFF), the NT20S display message 176 Line 1 Normal Character-string memory table #4 Number of Contents ...
Page 193
... The following describes the procedure to upgrade the bar graph display on the NT20S by changing the contents of the allocated words. To change the bar graph display on the NT20S, change the contents of the PC words to which the numeral memory tables have been allocated. The bar graph display cannot use hexadecimal numbers. If hexadecimal numbers are set, the bar graph will not be displayed. By writing a negative number (whose most significant digit is “ ...
Page 194
Lamps, Touch Switches, Numeral Setting 5-3 Lamps, Touch Switches, Numeral Setting 5-3-1 Allocation Bits and Display of Lamps Lamps are controlled by allocating them to the PC bits. Set the area and bit num- ber. S Available allocation bits The ...
Page 195
... The following describes the procedure to change the lamp display status on the NT20S by changing the contents of the allocated bits. To change the lamp display status on the NT20S, turn ON and OFF the lamp con- trol bit allocated in the PC. The lamp bit indicates the lamp status as follows: ...
Page 196
... Conveyor Loading Robot Arm C/ CLOCK S PC ladder program No PC ladder program is required to control the NT20S. Only a program to con- trol the robot arm movements is required. S NT20S operation When the ladder program to control the robot arm is executed, the lamps on the NT20S screen turn ON and OFF in synchronization with the robot arm move- ment ...
Page 197
... Lamps, Touch Switches, Numeral Setting 5-3-3 Allocated Bits, and Display, of Touch Switches Method for PC Notification and NT20S Control Two types of bit can be allocated to touch switches: notify bits - which serve to notify statuses to the PC - and control bits, lamp bit, which control the lighting (flashing) of the touch switches ...
Page 198
Lamps, Touch Switches, Numeral Setting S Notes on the Notification Operation The touch switch notification operations are as follows: Type of Notification Momentary Alternate Set Reset When using touch switch input notification, note the following points the case ...
Page 199
... Notifying the Host that a Switch has been Pressed (Determining Touch Switch Status) This section describes how the status of a touch switch (whether it has been pressed or not) is ascertained. With the NT20S, when a touch switch is pressed, the notify bit allocated to that touch switch in the PC memory is automatically notified. NT20S Lit ...
Page 200
Lamps, Touch Switches, Numeral Setting Depending on the set operation type, the status of the allocated bit for touch switch status notification will be controlled in one of the following ways (unless Ver.4 direct connection is used, in which case ...