28119 Parallax Inc, 28119 Datasheet - Page 99
28119
Manufacturer Part Number
28119
Description
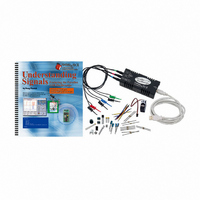
KIT UNDERSTANDING SIGNALS
Manufacturer
Parallax Inc
Datasheet
1.28119.pdf
(137 pages)
Specifications of 28119
Lead Free Status
Contains lead
Accessory Type
Oscilloscope
Interface Type
USB
For Use With/related Products
BASIC Stamp® 2 and Board of Education
Lead Free Status / Rohs Status
Lead free / RoHS Compliant
Available stocks
Company
Part Number
Manufacturer
Quantity
Price
Company:

Part Number:
281197-2
Manufacturer:
TE
Quantity:
20 000
Company:
Part Number:
281197-2
Manufacturer:
MOLEX
Quantity:
2 500


base. In this case, the time per division is 3 ms. Normally there are 50 data points per
division, now there are 150 per division.
As you can see from Figure 7-9, we have modulated the IR signal to the IR LED. This
created a pulse train on the output of the IR detector.
The first pulse is 3 ms; this can be used as a start bit. Every pulse after this start bit is one
ACTIVITY #2: DECODING INFRARED REMOTE CONTROL SIGNALS
In this activity we will not use the infrared LED in the circuit, only the detector. The IR
LED will in effect be disabled, because the program in this activity does not send voltage
to pin 7 where it is connected. Instead, this Activity uses a handheld remote control as an
infrared emitter.
Additional Required Parts
(1) Universal programmable infrared remote control, programmable for Sony TV’s.
Universal programmable infrared remote controls are widely available from major
electronics and discount stores, and usually cost less than $10.
Visualizing Handheld Remote Control Signals with DecodeSonyIRRemote.bs2
Configuring the OPTAscope Software
binary data bit. If the pulse is 1ms wide, it is a “logic 0”, if it’s 2ms long it’s a “logic 1”.
√
√
√
√
√
√
Under the Cursors tab, set the first Cursor Settings switch to Vertical Bars.
Use the cursors to measure the pulse widths.
Program your remote to be Sony compatible by following the manufacturer’s
instructions.
Point the IR LED away from the receiver so the receiver is unobstructed.
Configure your OPTAscope as shown in Figure 7-10.
Slide the Plot Area Indicator bar one division to the right.
Related parts for 28119
Image
Part Number
Description
Manufacturer
Datasheet
Request
R


Part Number:
Description:
Microcontroller Modules & Accessories DISCONTINUED BY PARALLAX
Manufacturer:
Parallax Inc

Part Number:
Description:
BOOK UNDERSTANDING SIGNALS
Manufacturer:
Parallax Inc
Datasheet:


Part Number:
Description:
COMPETITION RING FOR SUMOBOT
Manufacturer:
Parallax Inc
Datasheet:


Part Number:
Description:
TEXT INFRARED REMOTE FOR BOE-BOT
Manufacturer:
Parallax Inc
Datasheet:
Part Number:
Description:
BOARD EXPERIMENT+LCD NX-1000
Manufacturer:
Parallax Inc
Datasheet:

Part Number:
Description:
CONTROLLER 16SERVO MOTOR CONTROL
Manufacturer:
Parallax Inc
Datasheet:

Part Number:
Description:
BASIC STAMP LOGIC ANALYZER
Manufacturer:
Parallax Inc
Datasheet:

Part Number:
Description:
IC MCU 2K FLASH 50MHZ SO-18
Manufacturer:
Parallax Inc
Datasheet: