QDE-825D BANNER ENGINEERING, QDE-825D Datasheet - Page 63
QDE-825D
Manufacturer Part Number
QDE-825D
Description
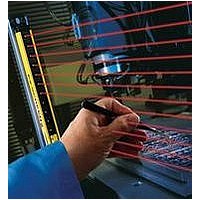
Safety Light Curtain
Manufacturer
BANNER ENGINEERING
Datasheet
1.QDE-815D.pdf
(74 pages)
Specifications of QDE-825D
Light Curtain Type
Safety
Accessory Type
Machine Interface Cable
For Use With
EZ-Screen Safety Light Screen


EZ-SCREEN
Instruction Manual
Setting cascaded sensors for scan code, trip or latch output,
external device monitoring (EDM), reduced resolution, fixed
blanking and inverted display is identical to the procedure for
non-cascadeable emitters and receivers (see Section 4).
Scan codes for each emitter and receiver pair must match.
However, for cascaded installations, scan codes must alternate
on adjacent systems as described in Section 3.1.8 and Figure
3-8. See warning below.
While the scan code, reduced resolution, fixed blanking, and
inverted display settings are independent for each cascaded
sensor pair, the trip/latch mode and EDM settings must be
determined by the first receiver in the cascade (closest to the
machine interface), which controls the OSSD outputs. All other
receivers in the cascade must be set for trip mode and
2-channel EDM (factory default settings).
The settings on the first receiver then determine trip or latch
mode and 1- or 2-channel EDM/aux. output, and this is the only
receiver that requires a reset following a latch condition.
One or more areas within any cascaded EZ-SCREEN sensor
pair can be blanked out, just as with other EZ-SCREEN light
screens. Each sensor pair within a cascade must be
programmed separately, if required. See Section 3.4.3 for
more information and programming procedure.
Each cascaded system must be configured, before it can be run
in a production environment.
Before configuration, install all emitters and receivers per
Sections 3 and 7. The last receiver must be terminated
either with a terminator plug or by connecting two closed
mechanical contacts (see Sections 7.8 and 7.9).
7.6 Cascaded Sensor Configuration Settings
7.6.1 Fixed Blanking
7.7 Configuration for Cascaded Operation
Banner Engineering Corp.
Banner Engineering Corp.
In situations where multiple systems are mounted closely
together, or where a secondary emitter is in view (within ±5°),
within range of an adjacent receiver; the adjacent systems must be
configured for different Scan Codes (i.e., one system set for Scan
Code 1 and the other for Scan Code 2).
If not, a receiver may synchronize to the signal from the wrong
emitter, reducing the safety function of the light screen.
This situation will be discovered by performing the trip test
(see Section 3.4.3).
www.bannerengineering.com • Tel: 763.544.3164
www.bannerengineering.com • Tel: 763.544.3164
WARNING . . .
•
•
Minneapolis, U.S.A.
Minneapolis, U.S.A.
Scan Code
Perform the following procedure on the first receiver only in
the cascade (closest to the machine interface).
1. From either normal operation or a power OFF condition, set
2. Set the third and fourth DIP switches (the second T/L and RR)
3. The receiver should be in a lockout condition or power OFF.
4. If power is OFF: Apply power
5. Coming out of lockout or during startup, the DIP switch
• F irst receiver display shows
• L ast cascaded receiver display shows
• O ther receivers display “1C” ON steady
• All receiver Zone indicators OFF
• All receiver Yellow reset indicators OFF
• All receiver Status indicators solid red
6. To enable and exit Cascade Teach Mode, reconfigure DIP
7. Perform a valid reset sequence (see Step 4), or cycle power.
Figure 7-7. DIP switch configuration to enable cascade installation
1. Install cascade system per Sections 3
With Power ON:
2. Set T/L and RR switches as shown on
3. Press the Reset button or cycle power.
4. Reconfigure DIP switches for normal
5. Press the Reset button or cycle power.
NO TE: If the EDM wiring does not match
the second and fifth DIP switches (RR and T/L) both to the
left (RR and T position).
both to the right (L and OFF position); see Figure 7-7.
Lockout condition: Perform a valid reset sequence (close
the reset switch for 0.25 to 2 seconds, then reopen).
configuration will be recognized as Cascaded Teach Mode,
indicated by the following:
switches for normal operation.
and 7 of this manual.
first receiver only (do not change
SC2/SC1 or E1/E2 switch positions).
operation.
Terminator connected: “1C” ON steady
E-stop w/closed contacts: “1CE” ON steady
E-stop w/open contacts: “1CE” flashing
the switch position shown (E2), an
EDM error occurs and fixed blanking
or cascade configuration will not be
allowed.
No E-stop connected: “4C,” “3C,” or “2C” ON steady
E-stop w/closed contacts: “4CE,” “3CE,” or “2CE” ON
E-stop w/open contacts: “4CE,” “3CE” or “2CE” flashing
steady
Cascadeable EZ-SCREEN
Overview
P/N 112852 rev. F
P/N 133487
61
61
Related parts for QDE-825D
Image
Part Number
Description
Manufacturer
Datasheet
Request
R

Part Number:
Description:
CDS EU 8 F RT 30 DSF8X22 1 GN B 30.0 63.5 12.7 5.46 N
Manufacturer:
BANNER ENGINEERING
Part Number:
Description:
CDS EU 8 F RT 5.0 DSF8x22 1 GN B 5.00 63.5 12.7 5.46 N
Manufacturer:
BANNER ENGINEERING
Part Number:
Description:
CDS EU 8 F RT 8.0 DSF8x22 1 GN B 8.00 63.5 12.7 5.46 N
Manufacturer:
BANNER ENGINEERING
Part Number:
Description:
CDS EU 8 F ST 15
Manufacturer:
BANNER ENGINEERING
Datasheet:
Part Number:
Description:
CDS EU 8 F RT 15 DSF8x22 1 GN B 15.0 63.5 12.7 5.46 N
Manufacturer:
BANNER ENGINEERING
Part Number:
Description:
CDS EU 8 F RT 23 DSF8X22 1 GN B 23.0 63.5 12.7 5.46 N
Manufacturer:
BANNER ENGINEERING

Part Number:
Description:
Safety Light Curtain
Manufacturer:
BANNER ENGINEERING
Datasheet:

Part Number:
Description:
Photoelectric Sensor
Manufacturer:
BANNER ENGINEERING
Datasheet:

Part Number:
Description:
Programmable Indicator Light
Manufacturer:
BANNER ENGINEERING
Datasheet:
Part Number:
Description:
INDICATOR LED PANEL 50MM GRN/RED/YEL 30V
Manufacturer:
BANNER ENGINEERING
Datasheet:
Part Number:
Description:
Programmable Indicator Light
Manufacturer:
BANNER ENGINEERING
Datasheet: