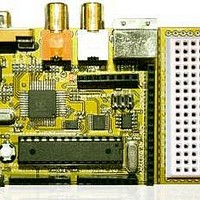
Chameleon-AVR Nurve Networks, Chameleon-AVR Datasheet - Page 121

Chameleon-AVR
Manufacturer Part Number
Chameleon-AVR
Description
MCU, MPU & DSP Development Tools AVR8 & PROPELLER DEV SYSTEM (SBC)
Manufacturer
Nurve Networks
Datasheet
1.CHAMELEON-AVR.pdf
(268 pages)
Specifications of Chameleon-AVR
Processor To Be Evaluated
AVR 328P
Data Bus Width
8 bit
Interface Type
USB, VGA, PS/2, I2C, ISP, SPI
Operating Supply Voltage
3.3 V, 5 V
Lead Free Status / RoHS Status
Lead free / RoHS Compliant
- Current page: 121 of 268
- Download datasheet (17Mb)
15.2.3.3 A Couple Notes About the Arduino Version of Hello World
When we get to the Programming API, we will discuss this a little more. But, you might be wondering what are the
differences between the pure C/C++ versions of our programs that compile on AVRStudio and the Arduino versions?
Well, there aren’t many. We wrote all the libraries to be 100% compatible. In fact, the differences can be listed in a few
sentences, they are:
1. The Arduino run-time library has its own main(), thus in all our programs, we just rename main() to loop() and then add
another function called setup() (which can be empty). Setup() is simply called first for all Arduino programs then the
loop() function is called just like main() and the program stays in there.
2. The Chameleon under AVRStudio has a number of libraries. One of them that is redundant is the serial UART library.
We had to write one for the AVRStudio version, but the Arduino has a serial library of its own. So you will notice that a lot
of the programs that use serial comment out the include file for the Chameleon serial library and we just use the Arduino
built in serial library (which is a C++ class).
3. When including headers with AVRStudio its typically setup to look in the local directories for the headers, so you put
quotes “header.h“ around the header names. Whereas, the Arduino tool makes your headers part of its libraries, so you
use angled brackets <header.h>.
That’s really about it. It takes less that 5 mins to port most Chameleon programs to Arduino mode and vice versa. Of
course, we have done this for you for all the demos that follow to get you started.
So the question is which mode to use – Arduino or AVRStudio? Well, depends on what you are doing and what you have.
If you do not own a AVR ISP MK II programmer then the decision is made for you – you probably have to use Arduino
mode. But, if you do have the programmer or something else supported by AVRStudio then you probably should work in
the more robust AVRStudio since it allows ASM language, simulation, etc.
But, its up to you – just have fun!
15.3 Installing the Parallax Propeller IDE
Since each Chameleon AVR (and PIC) has dual processors consisting of an AVR and Parallax Propeller chip, both chips
need to be loaded with firmware. and accessed to program To program the Parallax Propeller chip, you need to install the
Parallax IDE tool. This tool is a very simply IDE that allows you edit programs for the Propeller chip and download them
to the target. The editor has no built in debugging which is really a result of the Propeller chip’s lack of debugging
internally in hardware. However, this isn’t as bad as it seems. You can use “printf” techniques as well as run debug like
processes on other cores and have them interrogate memory locations in real-time. Finally, its pretty easy to test code,
change something, recompile and download to the target since programs can only be up to 32K bytes in size.
The Propeller Chip IDE was developed by Parallax Inc. to program their new multi-core “Propeller” chip. The
Chameleon AVR (and PIC) uses a Propeller chip as the media processor, thus to program the Propeller chip’s EEPROM
on the Chameleon with code we need to use this tool. The Propeller is a 32-bit processor and you program it in a BASIC
like language called SPIN, or you can program in Assembly language. The Propeller IDE supports both seamlessly. The
assembly language is very nice, but SPIN takes a bit to get used as does the editor which uses indentation like Python for
block level. This can be frustrating for C/C++ programmer initially. You can read about programming the Propeller chip
here:
Also, there is a single book about developing games and media applications for the Propeller chip:
The installation procedure for the Propeller IDE is very simple and consists of the Propeller tool itself along with some
“Virtual COM” port drivers developed by FTDI inc. that are needed to communicate with the Propeller Chip itself. These
drivers are installed as part of the installer program if everything goes smoothly. However, you might recall we have
already installed the FTDI drivers while setting up the Arduino tool. As you can see everyone seems to use FTDI chips!!!
Step 1: Locate the Propeller IDE installation program Setup-Propeller-Tool-v1.2.6.exe on the DVD here:
DVD-ROM :\ CHAM_AVR \ TOOLS \ PROPELLER \ Propeller_Manual_WebPM-v1.1.pdf
DVD-ROM :\ CHAM_AVR \ TOOLS \ PROPELLER \ PropellerDatasheet-v1.2.pdf
“Game Programming the Propeller Powered HYDRA” by Andre’ LaMothe.
© 2009 NURVE NETWORKS LLC “Exploring the Chameleon AVR 8-Bit”
121
Related parts for Chameleon-AVR
Image
Part Number
Description
Manufacturer
Datasheet
Request
R

Part Number:
Description:
MCU, MPU & DSP Development Tools PIC24 & PROPELLER DEV SYSTEM (SBC)
Manufacturer:
Nurve Networks
Datasheet:

Part Number:
Description:
MCU, MPU & DSP Development Tools AVR8 VIDEO GAME DEV SYSTEM (SBC)
Manufacturer:
Nurve Networks

Part Number:
Description:
MCU, MPU & DSP Development Tools PIC24 VIDEO GAME DEV SYSTEM (SBC)
Manufacturer:
Nurve Networks


