Chameleon-AVR Nurve Networks, Chameleon-AVR Datasheet - Page 168
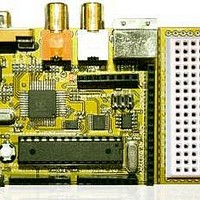
Chameleon-AVR
Manufacturer Part Number
Chameleon-AVR
Description
MCU, MPU & DSP Development Tools AVR8 & PROPELLER DEV SYSTEM (SBC)
Manufacturer
Nurve Networks
Datasheet
1.CHAMELEON-AVR.pdf
(268 pages)
Specifications of Chameleon-AVR
Processor To Be Evaluated
AVR 328P
Data Bus Width
8 bit
Interface Type
USB, VGA, PS/2, I2C, ISP, SPI
Operating Supply Voltage
3.3 V, 5 V
Lead Free Status / RoHS Status
Lead free / RoHS Compliant


20.1 Sending Messages to the Propeller Directly
Before we cover the API itself, let’s take a look at how we would manually send a message to the Propeller chip and what
these “wrapper” functions do. This is the first time we are discussing this since the UART and SPI drivers run on the AVR
side of things only, so they are local libraries. On the other hand, the NTSC, VGA, Keyboard, Mouse, Sound, and
Propeller I/O Port libraries all make calls over the SPI channel to the Propeller chip. This subtle difference is very
important; you do NOT need these libraries, anything you can do with the libraries, you can do directly with the
SPI_Prop_Send_Cmd(…), but to make life a little easier, I wrapped many of the commands in function calls for
convenience. For example, to print a character to the NTSC screen you can do it directly without the NTSC API like this:
Or you can call the NTSC API function to do it:
But, let’s dive into NTSC_Term_Char(…) and take a look:
As you can see, other than comments, the functionality of the two methods is identical! So, the point is, these API
functions are very “thin” wrapper functions that more or less give function names to the commands and make them pretty.
Use them if you wish. However, once you have a really nice Propeller driver written you will definitely want to create more
advanced API layers on the AVR side, so you can write high level code. But, in this case, most of the functions are 1:1
ARDUINO
TIP
Arduino tool users you will use the “Import Library” command from the main menu to
include CHAM_AVR_NTSC_DRV_V010, however all this really does is add the line of
code:
#include <CHAM_AVR_NTSC_DRV_V010.h>
To your program, which you can just do yourself. The Arduino tool already knows where
to look for other C/C++ files (since we copied them into the appropriate directories
already), thus for the Arduino tool simply add the header include manually or you can let
the tool do it from the main menu <Sketch -> Import Library>. The Arduino MAKE file is
rather complex and knows how to add all the C/C++ files we dumped into the library
directory, so there is little to do with the Arduino tool when accessing these libraries
other than including the header in your program.
© 2009 NURVE NETWORKS LLC “Exploring the Chameleon AVR 8-Bit”
168
Related parts for Chameleon-AVR
Image
Part Number
Description
Manufacturer
Datasheet
Request
R

Part Number:
Description:
MCU, MPU & DSP Development Tools PIC24 & PROPELLER DEV SYSTEM (SBC)
Manufacturer:
Nurve Networks
Datasheet:

Part Number:
Description:
MCU, MPU & DSP Development Tools AVR8 VIDEO GAME DEV SYSTEM (SBC)
Manufacturer:
Nurve Networks

Part Number:
Description:
MCU, MPU & DSP Development Tools PIC24 VIDEO GAME DEV SYSTEM (SBC)
Manufacturer:
Nurve Networks