Chameleon-AVR Nurve Networks, Chameleon-AVR Datasheet - Page 88
Chameleon-AVR
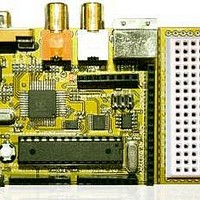
Manufacturer Part Number
Chameleon-AVR
Description
MCU, MPU & DSP Development Tools AVR8 & PROPELLER DEV SYSTEM (SBC)
Manufacturer
Nurve Networks
Datasheet
1.CHAMELEON-AVR.pdf
(268 pages)
Specifications of Chameleon-AVR
Processor To Be Evaluated
AVR 328P
Data Bus Width
8 bit
Interface Type
USB, VGA, PS/2, I2C, ISP, SPI
Operating Supply Voltage
3.3 V, 5 V
Lead Free Status / RoHS Status
Lead free / RoHS Compliant


© 2009 NURVE NETWORKS LLC “Exploring the Chameleon AVR 8-Bit”
Moving on, click <Finish> once you have the Debug Platform filled out appropriately. This should open AVR Studio up to
its default view which we might need to make adjustments to, so the correct tools are displayed. Take a look at Figure
15.21 below to accomplish this.
Figure 15.21 – Selecting the active tools in AVR Studio.
Referring to Figure 15.21 and selecting <View→Toolbars> from the Main Menu, you can select/de-select various tools
that you wish enabled in the IDE. More or less, enable all of them especially “AVR GCC” shown last in the list, we need
this tool, so we have access to the source tree of our project. You might want to do without the “Processor” and “I/O”
displays since they really only matter for simulation and debugging support, but it’s up to you. When you select the AVR
GCC tool, you should see the file list control on the left side of the IDE as shown in the figure, this is important. The
reason of course, this file list is where we will add/remove files for the current project in the “Source Files” folder as
shown in Figure 15.22 below.
Figure 15.22 – The AVR Studio GCC Source Files folder.
88
Related parts for Chameleon-AVR
Image
Part Number
Description
Manufacturer
Datasheet
Request
R

Part Number:
Description:
MCU, MPU & DSP Development Tools PIC24 & PROPELLER DEV SYSTEM (SBC)
Manufacturer:
Nurve Networks
Datasheet:

Part Number:
Description:
MCU, MPU & DSP Development Tools AVR8 VIDEO GAME DEV SYSTEM (SBC)
Manufacturer:
Nurve Networks

Part Number:
Description:
MCU, MPU & DSP Development Tools PIC24 VIDEO GAME DEV SYSTEM (SBC)
Manufacturer:
Nurve Networks