A000047 Arduino, A000047 Datasheet - Page 250
A000047
Manufacturer Part Number
A000047
Description
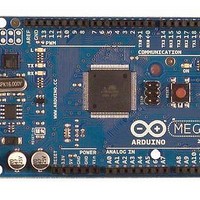
MCU, MPU & DSP Development Tools Mega2560
Manufacturer
Arduino
Series
-r
Type
MCUr
Specifications of A000047
Processor To Be Evaluated
ATmega2560
Interface Type
USB, I2C, SPI
Dimensions
4 in x 2.1 in
Operating Supply Voltage
5 V
Contents
Board
Lead Free Status / RoHS Status
Lead free / RoHS Compliant
For Use With/related Products
ATmega2560


2549M–AVR–09/10
1. The first step in a TWI transmission is to transmit a START condition. This is done by
2. When the START condition has been transmitted, the TWINT Flag in TWCR is set, and
3. The application software should now examine the value of TWSR, to make sure that the
4. When the address packet has been transmitted, the TWINT Flag in TWCR is set, and
5. The application software should now examine the value of TWSR, to make sure that the
6. When the data packet has been transmitted, the TWINT Flag in TWCR is set, and TWSR
7. The application software should now examine the value of TWSR, to make sure that the
writing a specific value into TWCR, instructing the TWI hardware to transmit a START
condition. Which value to write is described later on. However, it is important that the
TWINT bit is set in the value written. Writing a one to TWINT clears the flag. The TWI will
not start any operation as long as the TWINT bit in TWCR is set. Immediately after the
application has cleared TWINT, the TWI will initiate transmission of the START condition.
TWSR is updated with a status code indicating that the START condition has success-
fully been sent.
START condition was successfully transmitted. If TWSR indicates otherwise, the applica-
tion software might take some special action, like calling an error routine. Assuming that
the status code is as expected, the application must load SLA+W into TWDR. Remember
that TWDR is used both for address and data. After TWDR has been loaded with the
desired SLA+W, a specific value must be written to TWCR, instructing the TWI hardware
to transmit the SLA+W present in TWDR. Which value to write is described later on.
However, it is important that the TWINT bit is set in the value written. Writing a one to
TWINT clears the flag. The TWI will not start any operation as long as the TWINT bit in
TWCR is set. Immediately after the application has cleared TWINT, the TWI will initiate
transmission of the address packet.
TWSR is updated with a status code indicating that the address packet has successfully
been sent. The status code will also reflect whether a Slave acknowledged the packet or
not.
address packet was successfully transmitted, and that the value of the ACK bit was as
expected. If TWSR indicates otherwise, the application software might take some special
action, like calling an error routine. Assuming that the status code is as expected, the
application must load a data packet into TWDR. Subsequently, a specific value must be
written to TWCR, instructing the TWI hardware to transmit the data packet present in
TWDR. Which value to write is described later on. However, it is important that the
TWINT bit is set in the value written. Writing a one to TWINT clears the flag. The TWI will
not start any operation as long as the TWINT bit in TWCR is set. Immediately after the
application has cleared TWINT, the TWI will initiate transmission of the data packet.
is updated with a status code indicating that the data packet has successfully been sent.
The status code will also reflect whether a Slave acknowledged the packet or not.
data packet was successfully transmitted, and that the value of the ACK bit was as
expected. If TWSR indicates otherwise, the application software might take some special
action, like calling an error routine. Assuming that the status code is as expected, the
application must write a specific value to TWCR, instructing the TWI hardware to transmit
a STOP condition. Which value to write is described later on. However, it is important that
the TWINT bit is set in the value written. Writing a one to TWINT clears the flag. The TWI
will not start any operation as long as the TWINT bit in TWCR is set. Immediately after
the application has cleared TWINT, the TWI will initiate transmission of the STOP condi-
tion. Note that TWINT is NOT set after a STOP condition has been sent.
ATmega640/1280/1281/2560/2561
250
Related parts for A000047
Image
Part Number
Description
Manufacturer
Datasheet
Request
R

Part Number:
Description:
Daughter Cards & OEM Boards ARDUINO UNO PROTO PCB REV 3
Manufacturer:
Arduino
Part Number:
Description:
Daughter Cards & OEM Boards ARDUINO SHIELD PROTO KIT REV 3
Manufacturer:
Arduino
Part Number:
Description:
Daughter Cards & OEM Boards ARDUINO MEGA PROTO KIT REV 3
Manufacturer:
Arduino
Part Number:
Description:
Daughter Cards & OEM Boards ARDUINO MEGA PROTO PCB REV 3
Manufacturer:
Arduino
Part Number:
Description:
Development Boards & Kits - AVR ARDUINO STARTER KIT W/ UNO REV3
Manufacturer:
Arduino
Part Number:
Description:
RF Development Tools ARDUINO SHIELD WIRELESS PROTO
Manufacturer:
Arduino
Datasheet:
Part Number:
Description:
RF Development Tools ARDUINO SHIELD WIRELESS WITH SD
Manufacturer:
Arduino
Datasheet:

Part Number:
Description:
Development Software Getting started w/Arduino
Manufacturer:
Arduino

Part Number:
Description:
Ethernet Modules & Development Tools Ethernet Shield for Arduino
Manufacturer:
Arduino

Part Number:
Description:
MCU, MPU & DSP Development Tools LilyPad Arduino Main Board
Manufacturer:
Arduino

Part Number:
Description:
ARDUINO NANO Board
Manufacturer:
Arduino
Datasheet:
Part Number:
Description:
Ethernet Modules & Development Tools ETHERNET SHEILD PoE FOR ARDUINO
Manufacturer:
Arduino
Datasheet:

Part Number:
Description:
ATMEGA328 MCU IC W/ Arduino UNO Bootloader
Manufacturer:
Arduino
Datasheet:
Part Number:
Description:
Memory Cards MICRO SD CARD 1GB WITH SD ADAPTER
Manufacturer:
Arduino