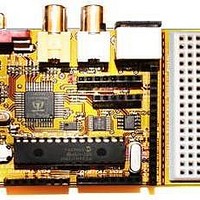
Chameleon-PIC Nurve Networks, Chameleon-PIC Datasheet - Page 105

Chameleon-PIC
Manufacturer Part Number
Chameleon-PIC
Description
MCU, MPU & DSP Development Tools PIC24 & PROPELLER DEV SYSTEM (SBC)
Manufacturer
Nurve Networks
Datasheet
1.CHAMELEON-PIC.pdf
(263 pages)
Specifications of Chameleon-PIC
Processor To Be Evaluated
PIC24
Data Bus Width
16 bit
Interface Type
USB, VGA, PS/2, I2C, ISP, SPI
Operating Supply Voltage
3.3 V, 5 V
Lead Free Status / RoHS Status
Lead free / RoHS Compliant
- Current page: 105 of 263
- Download datasheet (12Mb)
Before we can load the binary into the PIC24 processor we must connect the programmer to the Chameleon PIC as
shown in Figure 15.43. Notice that it requires use of the extra male right angle pin connector. This is needed to interface
the female PICkit 2 ICD interface to the female Chameleon PIC programming port.
Referring to Figure 15.43 the first step is to insert the right angle header into the PICkit 2. Next insert the complete
assembly into the 6-pin (not the 8-pin Propeller port) PIC24 programming header. When you insert the PICkit 2 into the
Chameleon PIC the PICkit 2 will not lay flush on the board, instead it will be propped up at an angle, this is fine. Make
sure the white arrow is facing away from the Propeller chip and is closer to the experimenter board region as shown in
Figure 15.43. The other end of the PICkit 2 is connected to a USB cable that is attached to any free USB port on the PC
that is running MPLAB IDE.
Now we need to tell MPLAB that we will be using the PICkit 2 as our primary programming device. To select the PICkit 2
choose the menu item located under <ProgrammerSelect ProgrammerPICkit 2> as can be seen in Figure 15.44.
Figure 15.43 – Plugging the PICkit 2 into the Chameleon PIC (note the white arrow is AWAY from the Propeller
NOTE
Depending on the length of the right angle header you may need to bend out the right angle
header so that instead of it being a nice 90° angle you might need it to be a 45° angle. This way
the PICkit 2 will clear the PS2 connector that it overlaps. You can bend each individual pin with a
needle nose pliers.
Also you may find it easier to reverse the right angle header so that the PICkit 2 overlaps the PIC
processor instead of the PS2 connector. When doing this make sure to turn the PICkit 2 upside
down so that the white arrow remains closest to the experimenters board area.
chip).
© 2009 NURVE NETWORKS LLC “Exploring the Chameleon PIC 16-Bit”
105
Related parts for Chameleon-PIC
Image
Part Number
Description
Manufacturer
Datasheet
Request
R

Part Number:
Description:
MCU, MPU & DSP Development Tools AVR8 VIDEO GAME DEV SYSTEM (SBC)
Manufacturer:
Nurve Networks

Part Number:
Description:
MCU, MPU & DSP Development Tools PIC24 VIDEO GAME DEV SYSTEM (SBC)
Manufacturer:
Nurve Networks

Part Number:
Description:
MCU, MPU & DSP Development Tools AVR8 & PROPELLER DEV SYSTEM (SBC)
Manufacturer:
Nurve Networks
Datasheet:


