Chameleon-PIC Nurve Networks, Chameleon-PIC Datasheet - Page 85
Chameleon-PIC
Manufacturer Part Number
Chameleon-PIC
Description
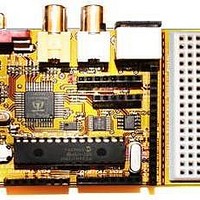
MCU, MPU & DSP Development Tools PIC24 & PROPELLER DEV SYSTEM (SBC)
Manufacturer
Nurve Networks
Datasheet
1.CHAMELEON-PIC.pdf
(263 pages)
Specifications of Chameleon-PIC
Processor To Be Evaluated
PIC24
Data Bus Width
16 bit
Interface Type
USB, VGA, PS/2, I2C, ISP, SPI
Operating Supply Voltage
3.3 V, 5 V
Lead Free Status / RoHS Status
Lead free / RoHS Compliant


Figure 15.9 tells us that we have successfully completed the MPLAB installation. It will question you whether you want the
wizard to restart your computer or not. I suggest that you restart your computer because the MPLAB installer, in addition
to the IDE, installs a number of environment variables along with device drivers for USB programmers one of which is the
PICkit 2 that we will be using.
Now that MPLAB is successfully installed we will install the PICkit 2 hardware and software (option).
15.1.2 Installing the PICkit2 Hardware and Software (Optional)
Now that MPLAB IDE is installed, we can install the PICkit 2 hardware.
Installing the PICkit 2 programmer consists of nothing more than plugging it into your PC with a USB cable. Go ahead and
do this now as. Once you plug it in, the PC should detect it and begin the installation process. The PICkit 2 is recognized
by windows as a Human-Interface Device and as such there is nothing more to do than wait until windows says “The
hardware has been installed successfully”.
If you opt for installing the PICkit 2 programming tool then the first step is to launch the installation executable found at the
following location:
After the installation wizard begins you will see a dialog as shown in Figure 15.10
DVD-ROM:\ CHAM_PIC \ TOOLS \ PIC \ PICkit 2 v2.61.00 Setup A \ setup.exe
TIP
TIP
Make sure to reboot your machine to allow the system to reconfigure USB device
drivers and all the environment variables to get set correctly. The MPLAB C compiler
depend on the previous installation of MPLAB IDE in-order to integrate properly, so we
want to make sure everything is clean.
Of course, if you do not have a PICkit 2 then you can skip this section since you are
probably planning on using the pre-flashed bootloader over the USB serial connection.
Figure 15.9 – MPLAB installation complete, restart computer.
© 2009 NURVE NETWORKS LLC “Exploring the Chameleon PIC 16-Bit”
85
Related parts for Chameleon-PIC
Image
Part Number
Description
Manufacturer
Datasheet
Request
R

Part Number:
Description:
MCU, MPU & DSP Development Tools AVR8 VIDEO GAME DEV SYSTEM (SBC)
Manufacturer:
Nurve Networks

Part Number:
Description:
MCU, MPU & DSP Development Tools PIC24 VIDEO GAME DEV SYSTEM (SBC)
Manufacturer:
Nurve Networks

Part Number:
Description:
MCU, MPU & DSP Development Tools AVR8 & PROPELLER DEV SYSTEM (SBC)
Manufacturer:
Nurve Networks
Datasheet: