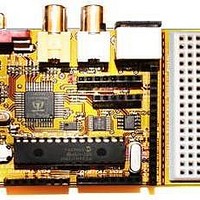
Chameleon-PIC Nurve Networks, Chameleon-PIC Datasheet - Page 206

Chameleon-PIC
Manufacturer Part Number
Chameleon-PIC
Description
MCU, MPU & DSP Development Tools PIC24 & PROPELLER DEV SYSTEM (SBC)
Manufacturer
Nurve Networks
Datasheet
1.CHAMELEON-PIC.pdf
(263 pages)
Specifications of Chameleon-PIC
Processor To Be Evaluated
PIC24
Data Bus Width
16 bit
Interface Type
USB, VGA, PS/2, I2C, ISP, SPI
Operating Supply Voltage
3.3 V, 5 V
Lead Free Status / RoHS Status
Lead free / RoHS Compliant
- Current page: 206 of 263
- Download datasheet (12Mb)
27.0 Chameleon Hands-On Programming Tutorials and Demos
Either you spent the past couple days reading up to this section or you cheated and skipped here! No matter how you got
here, finally it’s time to see some actual code and the Chameleon PIC 16-bit in action! First, some ground rules.
After experimenting with all the tutorial demos you will have a command of all the sub-systems of the Chameleon PIC 16-
Bit as well as be able to use the provided APIs to get things done. Then I suggest you start with the demos as templates
to get your own programs up and running before trying to do things from scratch.
27.1 Setup to Compile the Demos and Tutorials
To compile and run any of the tutorial demos you will need to have one of two things setup:
1. An MPLAB project open and ready to go along with an PICkit 2 programmer to directly download to the Chameleon’s
PIC programming port.
2. TextPad launched with the main demo project file open and the tools menu configured as discussed in Section 15.2. In
this variant we will use the USB cable and bootloader loaded onto the PIC to program its flash.
In a nutshell, if you just got your Chameleon PIC, it comes pre-FLASHED with a the Microchip bootloader and you can
use method 2 to run all the experiments. If on the other hand, you prefer a more robust tool like the Microchip MPLAB IDE
and you have purchases the PICkit 2 programmer (or similar) then you can compile and program the Chameleon PIC via
the 6-pin ISP port. Both methods and setups were covered earlier in the manual. But, let’s briefly review a couple details
about the differences between the MPLAB and bootloader version of each demo.
27.1.1 Differences Between the MPLAB and Bootloader Demos
Before we get into the pre-setup of MPLAB and the TextPad/Bootloader tool, let’s take a step back and discuss the
similarities and differences between the two tools and software as you write it.
First off, we previously discussed the setup of MPLAB IDE and the TextPad bootloader in the previous sections so refer to
this if need be. Both the MPLAB IDE and TextPad make use of the Microchip C compiler for PIC24 devices. These were
installed as standalone command line tools that you can use from a DOS terminal or from within an application. For this
reason the source code for either projects created in MPLAB or TextPad are 100% identical. The difference between
using the two tools are in the invocation of the compiler and the method for downloading into Flash. Again this was
discussed in previous sections of this manual.
27.1.2 Setup for MPLAB Version of Demos
The MPLAB versions of the demos are relatively straightforward to setup. We have already covered how to setup MPLAB
to compile, build a FLASH image and download with the PICkit 2 programmer. Thus, for each of the demos, all you need
to do is add the source C files to the project along with the main program and build the program and download.
Every tutorial was designed to show off some aspect of the Chameleon PIC’s hardware or a particular library.
Tutorials are not designed to be mind blowing or amazing, they are designed to show you how to use each
system and are very simple to get you started.
The Chameleon’s API is far from bug free. There are probably lots of little bugs that I haven’t found, so beware.
However, the APIs don’t really do much, but send messages to the objects running on the Propeller chip, so
ultimately if something doesn’t work it’s probably the driver!
Each tutorial demo follows the same outline; the demo will be introduced, a screen shot (if applicable),
compilation instructions for both the TextPad mode of operation and straight MPLAB.
Finally, the tutorials are organized in order of various sub-systems like keyboard, sound, graphics, etc. And each
demo might have a couple versions with different video drivers and/or VGA/NTSC support. I will tend to review
only one version of the demo since the others are usually variants. However, compilation files for each demo
version will be included.
© 2009 NURVE NETWORKS LLC “Exploring the Chameleon PIC 16-Bit”
206
Related parts for Chameleon-PIC
Image
Part Number
Description
Manufacturer
Datasheet
Request
R

Part Number:
Description:
MCU, MPU & DSP Development Tools AVR8 VIDEO GAME DEV SYSTEM (SBC)
Manufacturer:
Nurve Networks

Part Number:
Description:
MCU, MPU & DSP Development Tools PIC24 VIDEO GAME DEV SYSTEM (SBC)
Manufacturer:
Nurve Networks

Part Number:
Description:
MCU, MPU & DSP Development Tools AVR8 & PROPELLER DEV SYSTEM (SBC)
Manufacturer:
Nurve Networks
Datasheet:


