Chameleon-PIC Nurve Networks, Chameleon-PIC Datasheet - Page 123
Chameleon-PIC
Manufacturer Part Number
Chameleon-PIC
Description
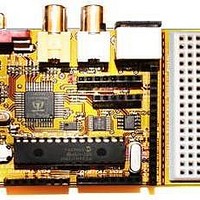
MCU, MPU & DSP Development Tools PIC24 & PROPELLER DEV SYSTEM (SBC)
Manufacturer
Nurve Networks
Datasheet
1.CHAMELEON-PIC.pdf
(263 pages)
Specifications of Chameleon-PIC
Processor To Be Evaluated
PIC24
Data Bus Width
16 bit
Interface Type
USB, VGA, PS/2, I2C, ISP, SPI
Operating Supply Voltage
3.3 V, 5 V
Lead Free Status / RoHS Status
Lead free / RoHS Compliant


At this point, the Propeller tool should be installed and ready to go. Let’s test it out.
15.3.1 Launching the Propeller Tool
The Propeller tool communicates to the Propeller chip over a single 2-line serial connection with the standard RS-232
TX/RX pair along with DTR (data terminal ready) as a reset line. The Chameleon’s USB serial port is used for the
communications channel for the Propeller chip. However, if you recall, the USB serial port can be used by the PIC or the
Propeller. The device that gets connected to the port is controlled by the serial selection switch next to the RESET button.
Simply place the switch in the UPPER position to select the Propeller chip to have access to the USB serial port. This is
shown in Figure 15.62 below.
You already installed the Propeller tool, so all we have to do now is run the tool which is very simple. The first step is to
make sure that the PC recognizes the Chameleon and installs a virtual USB COM port. When you connected your test
Chameleon PIC to the PC via the USB cable and powered the Chameleon up, the FTDI drivers on the PC should have
detected a NEW USB port and assigned a COM port to it, you can find the COM port # in the system devices menu. You
will need this later for the serial communications test, however, the Propeller tool will autoscan all COM ports until it finds
the Propeller chip connected to one. With that in mind, here are the steps to load the firmware into the Propeller chip, you
will do this for every Chameleon PIC (and AVR) in the final testing process.
Step 1: Launch the Propeller IDE tool by clicking the shortcut on the desktop.
Step 2: Navigate to where you copied the source directory files on your PC and open the master file
cham_default2_drv_111.spin. It is located on the DVD-ROM here:
This is shown in Figure 15.63 (ignore my slightly different hard drive paths).
TROUBLESHOOTING
DVD-ROM :\ CHAM_PIC \ SOURCE \ PROPELLER_DRIVER \
Figure 15.62 – Placing the Chameleon into Propeller serial mode.
If you have trouble installing the USB drivers, there is another “stand alone” installer that
will do a “force install” on them. The name of the file is:
USBDriverInstallerV2.04.16.exe, it’s located in the directory CHAM_PIC \ TOOLS \
DRIVERS \ and usually will deal with any problems encountered during normal
installation.
© 2009 NURVE NETWORKS LLC “Exploring the Chameleon PIC 16-Bit”
123
Related parts for Chameleon-PIC
Image
Part Number
Description
Manufacturer
Datasheet
Request
R

Part Number:
Description:
MCU, MPU & DSP Development Tools AVR8 VIDEO GAME DEV SYSTEM (SBC)
Manufacturer:
Nurve Networks

Part Number:
Description:
MCU, MPU & DSP Development Tools PIC24 VIDEO GAME DEV SYSTEM (SBC)
Manufacturer:
Nurve Networks

Part Number:
Description:
MCU, MPU & DSP Development Tools AVR8 & PROPELLER DEV SYSTEM (SBC)
Manufacturer:
Nurve Networks
Datasheet: