Chameleon-PIC Nurve Networks, Chameleon-PIC Datasheet - Page 247
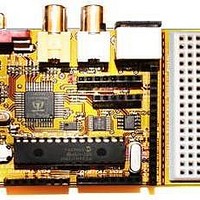
Chameleon-PIC
Manufacturer Part Number
Chameleon-PIC
Description
MCU, MPU & DSP Development Tools PIC24 & PROPELLER DEV SYSTEM (SBC)
Manufacturer
Nurve Networks
Datasheet
1.CHAMELEON-PIC.pdf
(263 pages)
Specifications of Chameleon-PIC
Processor To Be Evaluated
PIC24
Data Bus Width
16 bit
Interface Type
USB, VGA, PS/2, I2C, ISP, SPI
Operating Supply Voltage
3.3 V, 5 V
Lead Free Status / RoHS Status
Lead free / RoHS Compliant


// MAIN
///////////////////////////////////////////////////////////////////////////////////////////////////////////////
////////////////////////////////////////////////////////////////////////////////////////////////////////////////
///////
int main(void)
{
// Always call ConfigureClock first
SYS_ConfigureClock(MAX_FCY_RATE);
// initialize SPI
SPI_Init();
// give Prop a moment before sending it commands, the boot process is about a second
// if you like you can speed it up, by removing the Prop driver's "LED blink" sequence in the driver
// or speed it up, but commands that are sent before the Prop driver is done booting will be ignored.
// therefore, if you have a lot of set up work to do, then you don't require a delay, but if you jump right
// into commands, then you need a good 1.5 - 2 second delay
DELAY_MS( 2500 );
// clear screens
NTSC_ClearScreen();
NTSC_Color(0);
// enter infinite loop...
while(1)
} // end main
This example file can be located on the DVD here:
Compiling and building these programs should be old hat to you now, so I won’t waste time with that. Let’s just look at the
code. Referring back to the source listing above, there are 2 things that make this program really
First, the addition of the message ids, show here:
// new commands for status LED control
#define STATUS_LED_ON
#define STATUS_LED_OFF 101
And secondly, the actual messages to the Propeller to turn the LED on and off (the on message for example):
And that’s it! It just works – If you compile and run this program you will see the status LED blink on and off as well as the
NTSC monitor display messages.
As you can see, it’s very simple to add new functionality to the driver and if you are careful and make sure not to re-use
message ids then you can deploy your new driver for other Chameleon users (both AVR and PIC) and they can use the
driver without change in their Chameleons and all their old programs will still work, but your new functionality will be at
their finger tips.
{
// print on NTSC terminal screen
NTSC_Term_Print(" Status LED ON");
NTSC_Term_Char( 0x0D );
// send command to turn on LED
SPI_Prop_Send_Cmd(STATUS_LED_ON, 0,0 );
// slow things down a bit, so we can read the text!
DELAY_MS(250);
NTSC_Term_Print(" Status LED OFF");
NTSC_Term_Char( 0x0D );
// send command to turn off LED
SPI_Prop_Send_Cmd(STATUS_LED_OFF, 0,0 );
// slow things down a bit, so we can read the text!
DELAY_MS(250);
} // end while
// send command to turn on LED
SPI_Prop_Send_Cmd(STATUS_LED_ON, 0,0 );
DVD-ROM:\ CHAM_PIC \ SOURCE \ CHAM_PIC_STATUS_LED_DEMO_01.c
100
© 2009 NURVE NETWORKS LLC “Exploring the Chameleon PIC 16-Bit”
247
Related parts for Chameleon-PIC
Image
Part Number
Description
Manufacturer
Datasheet
Request
R

Part Number:
Description:
MCU, MPU & DSP Development Tools AVR8 VIDEO GAME DEV SYSTEM (SBC)
Manufacturer:
Nurve Networks

Part Number:
Description:
MCU, MPU & DSP Development Tools PIC24 VIDEO GAME DEV SYSTEM (SBC)
Manufacturer:
Nurve Networks

Part Number:
Description:
MCU, MPU & DSP Development Tools AVR8 & PROPELLER DEV SYSTEM (SBC)
Manufacturer:
Nurve Networks
Datasheet: